Starting seeds indoors

by Mark Levisay

In spite of the snow we’ve had recently this is a good time to think about starting garden seeds indoors.  You may have a favorite variety of a vegetable or flower you can’t normally find at a garden center and planting them from seed may be your only option.  Generally you can get a wider range of varieties of plants available in seed form, so learning to start them indoors is a good idea.  It may take anywhere from six to eight weeks for the seedlings to be ready to harden off (more on that later) and germinating time might be up to two weeks, though many are much faster.  Now is the time to plant seeds for plants you want ready for the garden in early April-things like broccoli and cabbage.  Peppers and tomatoes can wait until March.

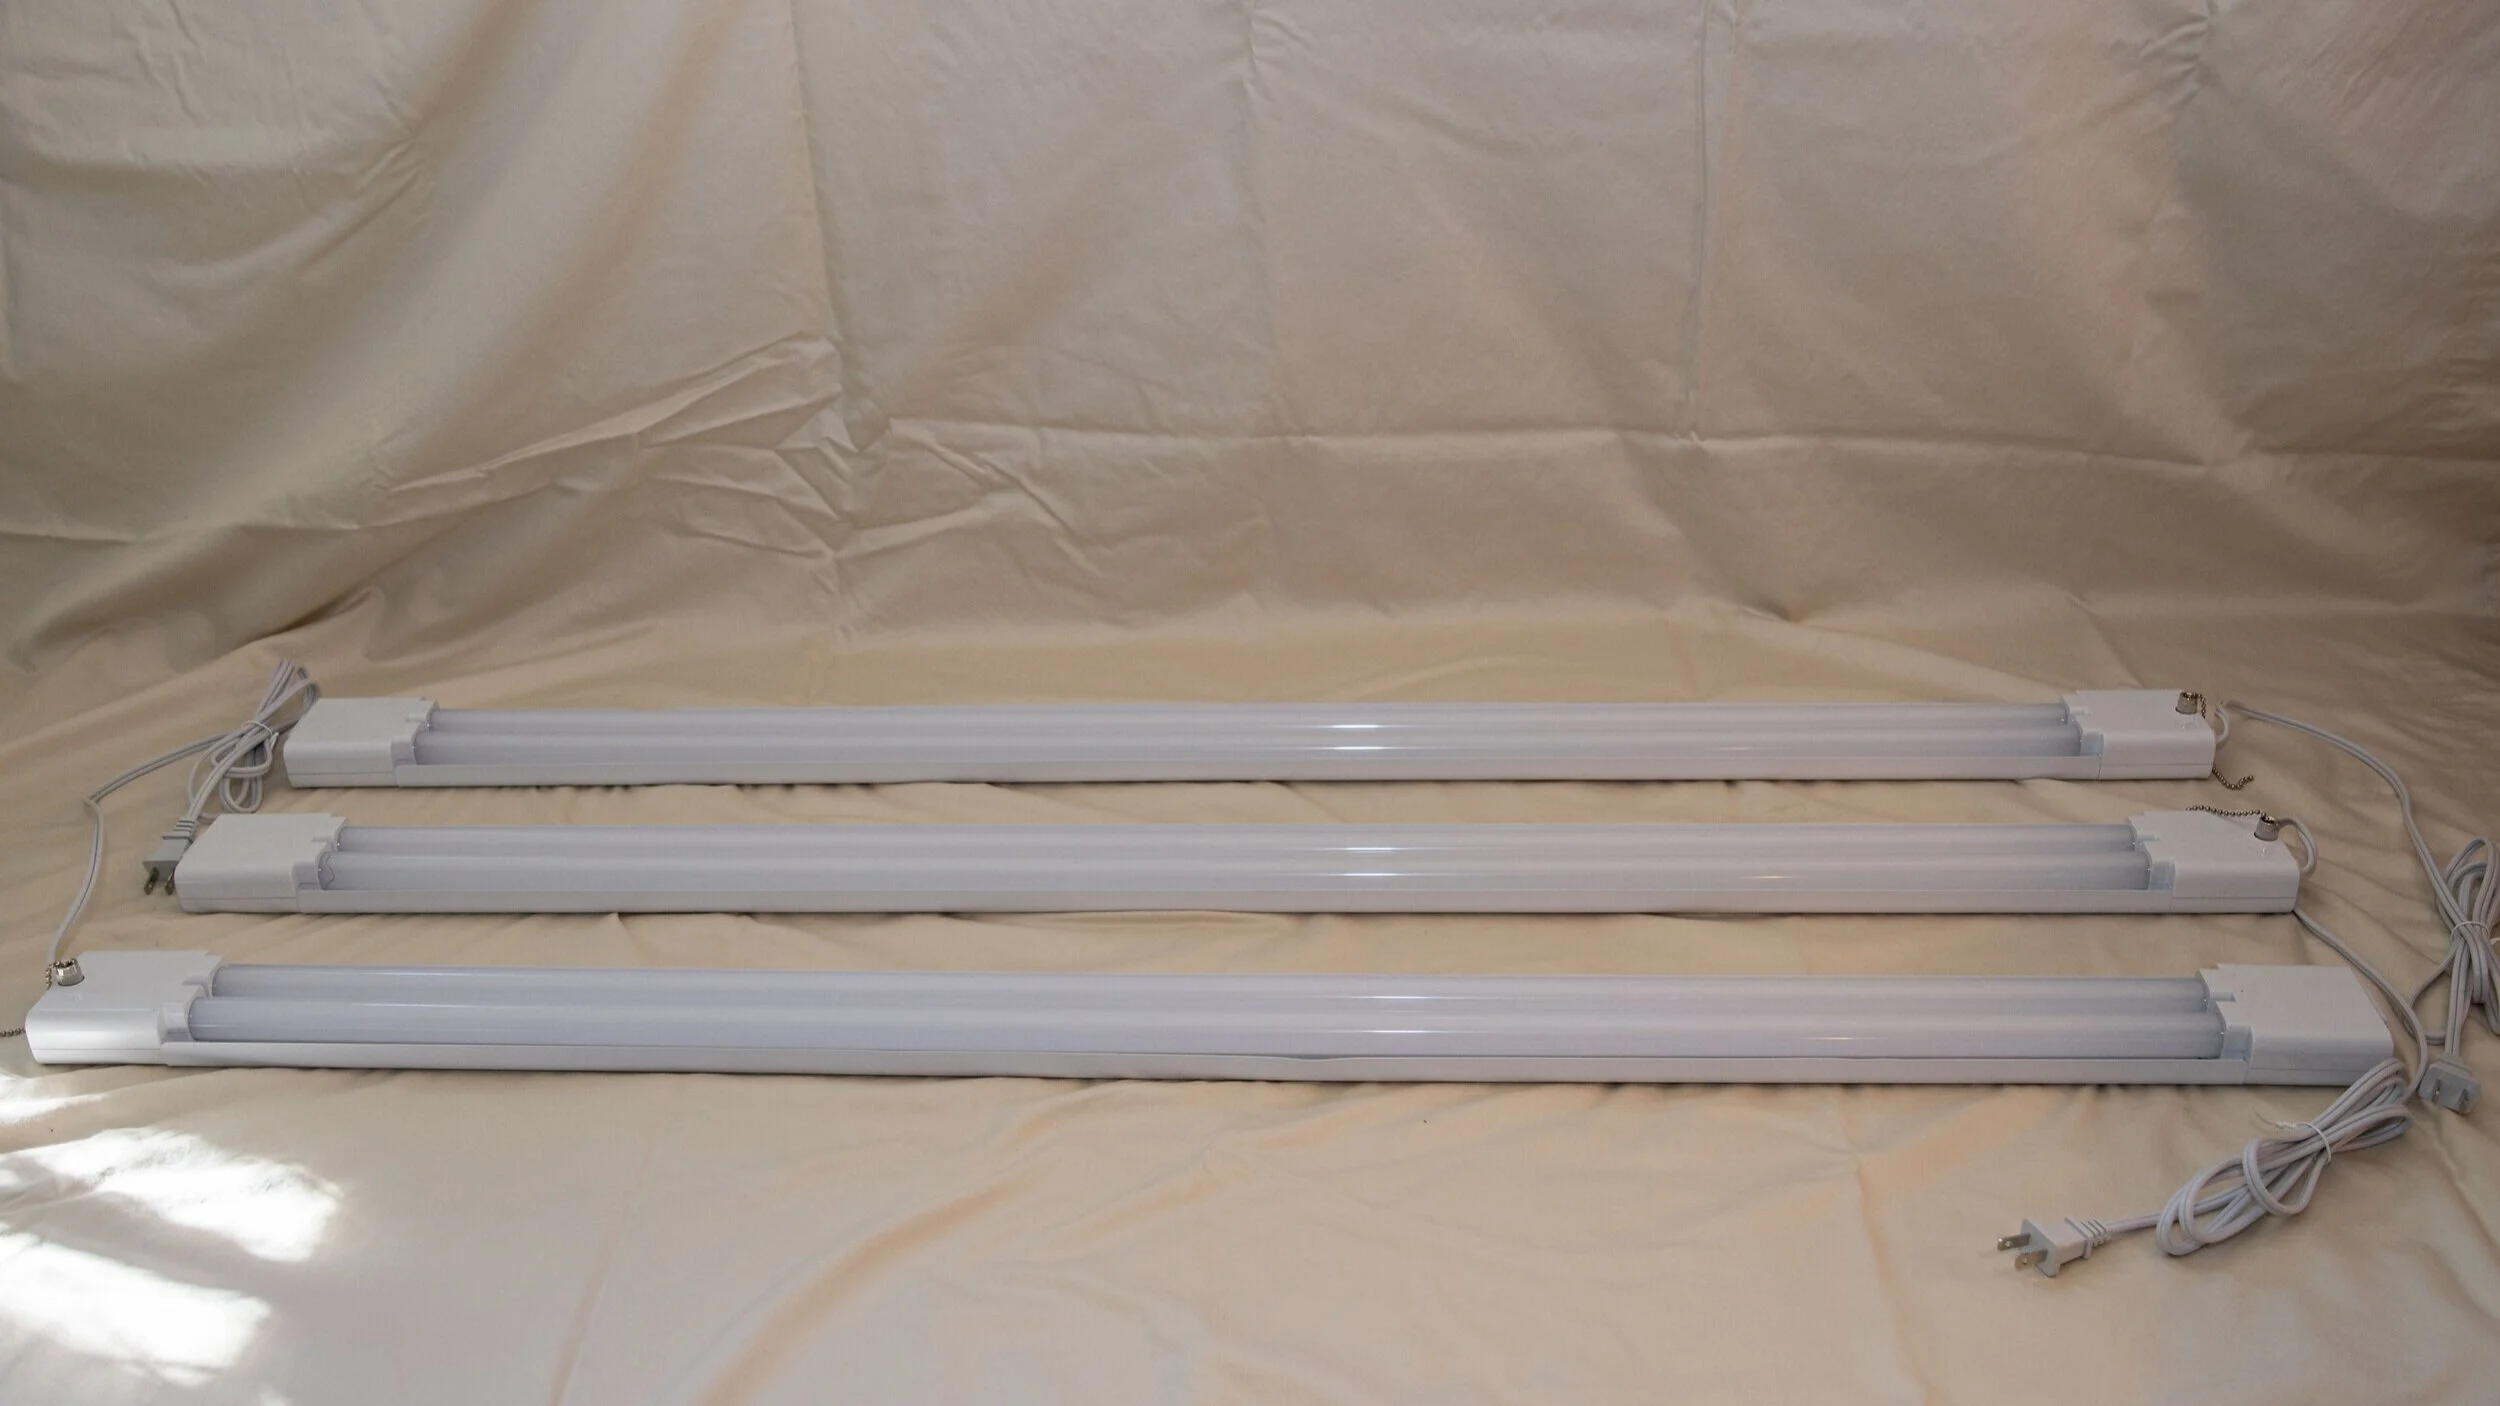
There aren’t too many things you’ll need to start seeds indoors, but good lights are probably the most important.  Few homes have large south facing windows which might provide enough natural light for seed germination and growth.  Better to invest in bright artificial light that you can place anywhere that you have space for a table.  Today LED lights are probably your best bet, as they are lightweight, bright, use little electricity and last a long time.  They usually are available in daylight spectrum light which is optimal for plant growth.  In my last blog I detailed making my new three fixture LED which is 4’ long and can cover four “flats” of plants.  If you don’t have that much room a 2’ long fixture would cover one flat and that might be all you need.  You’ll want to hang them about 6-9” above the soil level of the pots you’re using and then be able to raise them as your plants grow.

You can use any kind of tray or pot for starting seeds as long as it has drainage and has been disinfected.  You shouldn’t have to clean newly bought pots, but if your pots have been used before clean them thoroughly with a mixture of 1 part bleach to 10 parts water and let dry before filling with soil.

Two types of plastic “6-packs” used for seed starting.  The larger fit 6 to a flat, where the smaller go 12 to a flat.

Two types of plastic “6-packs” used for seed starting.  The larger fit 6 to a flat, where the smaller go 12 to a flat.

Currently I’m using the larger sized cups for plants that will be under the lights for quite a while.  Later on I’ll use the smaller cups for things like tomatoes and peppers that will germinate and go outside pretty quickly.  I also use a large flat tray under my plant flats to keep excess water from pouring onto the floor.  This tray actually came from under the air handler in my heat pump system.  This had cracked and needed to be replaced.  I rescued and re-purposed it for plant duties.  Any other flat, rimmed tray will work, or even an old towel placed on your table under the flats.

The soil you use in your plant pots is important—you don’t want it to contain any real nutrients for the plants and most general potting soils contain slow release fertilizer.  Instead, use seed starter potting soil specifically designed for the job.  Espoma, Jiffy, and Miracle Gro all sell these.  I’ve had trouble wetting the Jiffy Mix thoroughly, so I usually use the Miracle Gro Seed Starter mix. Espoma is a good option if you are looking for an organic product. If you do buy the Jiffy Mix, put it in a bucket and soak it in water until it is thoroughly wet.  Squeeze out the excess water before filling your pots.  Never let the soil dry out, as it can be hard to re-wet, and seeds need constant moisture to germinate.  You won’t need to add fertilizer until after the seedlings get their first set of adult leaves, and at that point you can use a liquid soluble general purpose fertilizer when you water.

Labels are really important, especially if you’re growing several varieties of the same plant, as all of the seedlings will look the same, and it’s easy to get confused.  Some of the plastic 6-packs will come with plastic labels, but you can also make your own.  Popsicle sticks, tongue depressors or even strips of cardboard will do.  If you re-use them from year to year it’s a good idea to disinfect them with your 10-1 bleach solution.

Now let’s go through the procedure I use to plant the seeds.  First, I fill the cleaned 6-packs with seed starter soil, level to the tops.

6-packs filled with dry seed starter soil

6-packs filled with dry seed starter soil

My second step is to put the packs in the driveway and water them with a watering can to thoroughly soak the soil.

6-pack after watering

6-pack after watering

You’ll note that the watering process compacts the soil slightly in the cups, giving you space to add seeds.

Next I’ll bring those wet 6-packs back in the house and put them under the lights, which at this stage really help you see what you’re doing!  I label the 6-packs, or even the rows within them, and then place seeds into the cups.  I generally put 2 seeds in each cup, and later thin out one if both germinate.  With some flowers I let 2 plants grow and then separate them when planting.  Press the seeds down lightly so that they make good contact with the wet soil.

6-pack with labels and pepper seeds

6-pack with labels and pepper seeds

Next, I’ll cover the seeds with a small amount of the seed starter mix and water it.  Some seeds need light to germinate (for example coleus and statice) so check your seed packs for specific instructions.  Seeds only need to be covered to about their own thickness, so this isn’t much soil and I use a spray bottle rather than a watering can, as the spray disturbs the seeds less.

6-pack with seeds covered, and spray bottle ready for the next step.

6-pack with seeds covered, and spray bottle ready for the next step.

Now for the waiting, as some seeds can take up to two weeks to germinate.  Keep them moist at all times.  Some people cover the moist flats with “Saran” plastic wrap to hold in the moisture.  Some seed trays will come with clear plastic covers used to keep in moisture.  I just use my spray bottle multiple times each day to keep the soil moist.  Once the seeds germinate  you can switch back to watering in a more conventional manner.  Use the light from dawn to dusk, but don’t run them 24 hours a day.  Keep the trays in a warm but not hot area of your home.  I keep my house at 68F and have never had a problem.  I have also started to use an oscillating fan on the other side of the room to simulate nature’s breezes, as I think this makes the plant stems stronger.

My light table set up with a flat of planted and watered seeds.

My light table set up with a flat of planted and watered seeds.

Once the plants are up you may need to raise the lights so that you’re always 6-9” above the tops of the plants.  When the plants have grown for a while, they’ll start to look more like the ones you might see on sale at The Corner Store.  Now it’s time to “harden off” which is the process of acclimatizing the plants to the great outdoors.  Place them outdoors in a shady area, and each day give them a few hours of sun, increasing the amount each day for a week or until they’re in full sun.  Keep them well watered, as the little plants are not used to this outdoor stuff.  If it looks like rain you may want to put them under cover, as often a heavy rain will knock over the young plants.

Give this a try, and before you know it the process will be second nature.  If you have any questions please e-mail me at marklevisay@gmail.com.  Good luck!

Building a LED seed starting light

Last fall I decided to re-build my seed starting light using brighter and more energy efficient LED lights.  My original light consisted of two 2-bulb 48” fluorescent “shop light” fixtures hanging in a wooden frame with chains so the height of the lights could be adjusted.  Each February, I set up a folding table and position the light frame on top to begin seed starting for the year.

This set up had always worked well, though the fluorescent bulbs seem to dim with time, and then pose a disposal hazard due to the mercury inside them.  Using modern LED lights promised a reduction in energy use and a long life span.  I ordered a set of four Freelicht brand 45W, 4500 Lumen, 5000K (daylight balanced) 2 bulb 48” LED light fixtures from Amazon.com which cost about $75.  Once they arrived I immediately installed one fixture in my workshop to see how it worked.  I was pleased to find the fixtures light in weight and obviously brighter than the fluorescent light they replaced.

My original light hanging frame, made from 1x2” lumber is 53” long and 36” high, plenty of room for the 48” light fixtures and space for 4 standard plant flats. The frame sits on top of a folding table I set up each February for the seed starting se…

My original light hanging frame, made from 1x2” lumber is 53” long and 36” high, plenty of room for the 48” light fixtures and space for 4 standard plant flats. The frame sits on top of a folding table I set up each February for the seed starting season.

Now, how to link together the three light fixtures?  The lights each come with 2 short cables with an eye on one end and hook on the other, which made it easy to install the fixture to the rafters in my workshop.  The lights also are built with a typical “keyhole” for mounting on a screw flush to a surface on each end, and I decided to try this route.

The 48” lights each come with a cord, pullchain style switch and a receptacle to allow lights to be linked together.

The 48” lights each come with a cord, pullchain style switch and a receptacle to allow lights to be linked together.

I cut two pieces of 1x2” lumber into 22” lengths and carefully measured the center of each, and then 9” on either side.  I drilled pilot holes and then inserted #8 x1” wood screws into the holes, leaving just enough space to be able to insert the screwheads into the light fixtures.

The 48” lights each come with a cord, pullchain style switch and a receptacle to allow lights to be linked together.

The 48” lights each come with a cord, pullchain style switch and a receptacle to allow lights to be linked together.

To keep the light fixtures from sliding around and falling off the screws I used clear silicone sealant as an adhesive to “glue” the light fixtures to the boards.  The silicone is not a super strong adhesive, so I can break the bond and change the light spacing later if I need to.

Closer look at the silicone holding the board in place on the light fixture.

Closer look at the silicone holding the board in place on the light fixture.

Once the silicone adhesive has set up I was able to turn the light assembly over and attach 2 eyehooks to the top center portion of the boards.  This will allow me to attach the lights to my hanging frame with two lightweight chains.  The chains allow the light to be lowered or raised depending on the size of the growing plants.

Three light assembly with eyehooks ready for hanging.

Three light assembly with eyehooks ready for hanging.

Now for the finished product!  When I mounted the three light fixtures to the boards, I made sure to reverse the middle fixture so that two of them could be plugged into each other.  This allows just one light to be plugged into the plugstrip on the hanging frame, and I can use the plugstrip switch to control all three lights at once.  The only final adjustment I had to make was to add 2 large washers to the top of one light fixture as balancing weights to get the overall setup to hang level.

Finished light assembly hanging in frame and all lit up!

Finished light assembly hanging in frame and all lit up!

Now I will set up my folding table and I’ll be ready to start some seeds!  I usually start my first seeds indoors on Groundhog’s Day (2/2), so it won’t be long.  Next time I’ll write about the details of that process, what seeds I start that early in the year, and give you an update on how the new lights are working out!

Any questions feel free to contact me at marklevisay@gmail.com.

Spotlight on Annuals: Angelonia “Archangel Pink”

by Mark Levisay

Len Lamm of the Corner Store Garden Center introduced me to a flowering annual that is new to me but looks like a worthwhile addition to your garden.  “Archangel pink” angelonia (angelonia angustifolia) is a hybrid “summer snapdragon” developed by the Ball Seed Company.  Even though it is often called the “summer snapdragon” it is actually not a true snapdragon and is in the same family of plants as penstemon and foxglove.

Easy-to-grow Angelonia works in containers or borders.

Easy-to-grow Angelonia works in containers or borders.

Low maintenance and deer resistant

Angelonia “Archangel pink” has a lot going for it.  The upright plants are deer resistant and both heat and drought tolerant.  They bloom from late spring through the summer, and don’t require deadheading.  The long lasting flowers have a lovely scent and attract butterflies and hummingbirds.  The modest sized plants spread 10-12” horizontally and are typically from 12-14” tall.  They’re considered low maintenance as they won’t require a lot of pruning or deadheading through their blooming season.  The Angelonia flowers are also good for cut arrangements and remind me a little of orchid flowers.

Angelonia is a stunning addition to any garden.

Angelonia is a stunning addition to any garden.

A beautiful, unique plant for containers or borders

This Angelonia would seem like a welcome addition to a lot of containers, as it won’t overwhelm its neighbors with the upright habit and modest size.  Combining this with some more low growing/spreading plants would be a winning combination.  You can also plant this in a border for the long lasting pink color or in groups where you’d appreciate their scent.  Ball Seed advises watering two or three times per week for the first three weeks after you plant the Angelonia, but just weekly after that.  Fertilizing once a month with a fertilizer like Espoma’s “Flower-Tone” should keep your plants blooming all summer long!

Give this beautiful annual a try and let me know how you like it.  Any questions contact me at marklevisay@gmail.com.