by Mark Levisay
As we head into April our gardening activities will pick up, especially outdoors as the weather warms. Seed starting projects indoors will come to an end, and many vegetables will go into the ground outdoors.
Inside seed starting
If you’re starting seeds indoors, it’s time to plant tomato and basil seeds if you haven’t already done so. They germinate in about a week, and you don’t want to put them out into the garden until mid-May, so this is the time. Peppers that I planted at the beginning of March are now up—they can take two weeks or more to germinate, so it may be too late to plant the seeds now. If you planted any other seeds earlier this year you may need to transplant them into bigger pots. I had planted lettuce seed at the beginning of February, and they needed to be re-potted after about four weeks. After two weeks in their bigger pots I was able to plant them into our new cold frame, and also into the covered bed we maintained all winter.
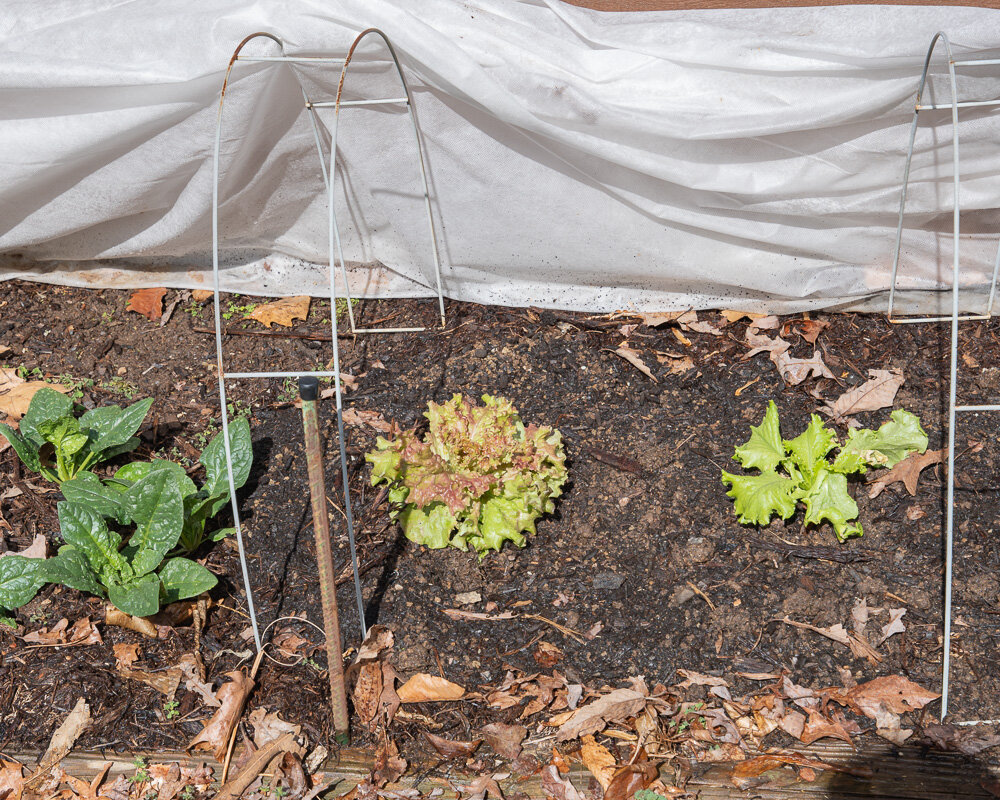
Two lettuce plants placed into the covered bed.

The back row plants in the cold frame were all started indoors.
Cool season crops outdoors
Outdoors it’s time to start planting early season cool weather crops. From seed you can plant lettuce, beets and carrots, as they can all tolerate some cold weather and even frosts as they come up. Plant seed potatoes now, as long as the soil’s not too wet to work. I usually mulch over the entire area that I’ve planted the potatoes, as this helps them avoid the sun, which causes the green skin condition you see from time to time.
It’s also time to put out cabbage, broccoli and cauliflower seedlings. I strongly recommend using row cover fabric over brassicas, as they tend to suffer from caterpillar infestations when the weather warms. I did a blog last year about row covers and you can refer to that for more information. The Corner Store Garden Center has seed potatoes and brassica seedlings, in addition to other plants available now.
Plan ahead for mid-season
While you’re out in the garden planting the early crops it’s also a good idea to plan for the mid-season crops. Things like corn, beans, melons, peppers and tomatoes won’t be going out until danger of frost is past, or mid-May. Some of them grow quickly and get quite tall and you don’t want them to be shading shorter plants. Or, maybe you DO want them to shade early crops like spinach and lettuce that suffer in the heat. You can also get your hoses out of storage and check for leaks, and plan where you might want to set up circuits of soaker hoses. Plan things out now and you’ll be ready when May rolls around.
Lawn maintenance
I’m sure you’re starting to notice the grass greening up, and this is the time to start preparing for the upcoming mowing season. Pick up any sticks and branches that have fallen during the winter, and vigorously rake any areas that seem to have a lot of old leaves or thatch built up. It’s a great time to spread lime on the lawn, as most of us have soil that is more acidic than grass prefers. It’s also time to apply pre-emergent crabgrass control chemicals if you are planning on doing that. A general rule is to apply the product when the forsythia is blooming (now!) so the chemicals can prevent the crabgrass seed from germinating. In general it’s better to wait until fall for general lawn fertilization, but many of the crabgrass products do contain some fertilizer. Problem areas in the lawn may benefit from some fertilizer applied in the spring, but overall you’re just asking to mow more than you probably want to! Speaking of mowing, I always recommend setting the mower on the highest possible setting, as taller grass is usually healthier, and acts to shade out weeds. It is called TALL fescue, after all.
Any questions, e-mail me at marklevisay@gmail.com. Good luck with your 2021 garden!