What’s happening in the garden in March

by Mark Levisay

March is the time many of us turn our thoughts to gardening as we start to have more sunshine and warmer days.  I wanted to review what I’m doing in my garden so that you can follow along in yours.

If you’re starting seeds indoors it’s time to plant pepper seeds, as they take almost 2 weeks to germinate.  Tomato seeds germinate faster, so they can wait until the second or third week in March.  Many flower seeds can be started indoors for earlier flowering outdoors-check the back of the seed packets to see how many weeks before the last frost to start them.  Plan on a week of hardening off, or slowly acclimatizing the young plants to outdoor conditions.  For tomatoes and peppers that should be around the first week of May, as our average last frost is 5/10.

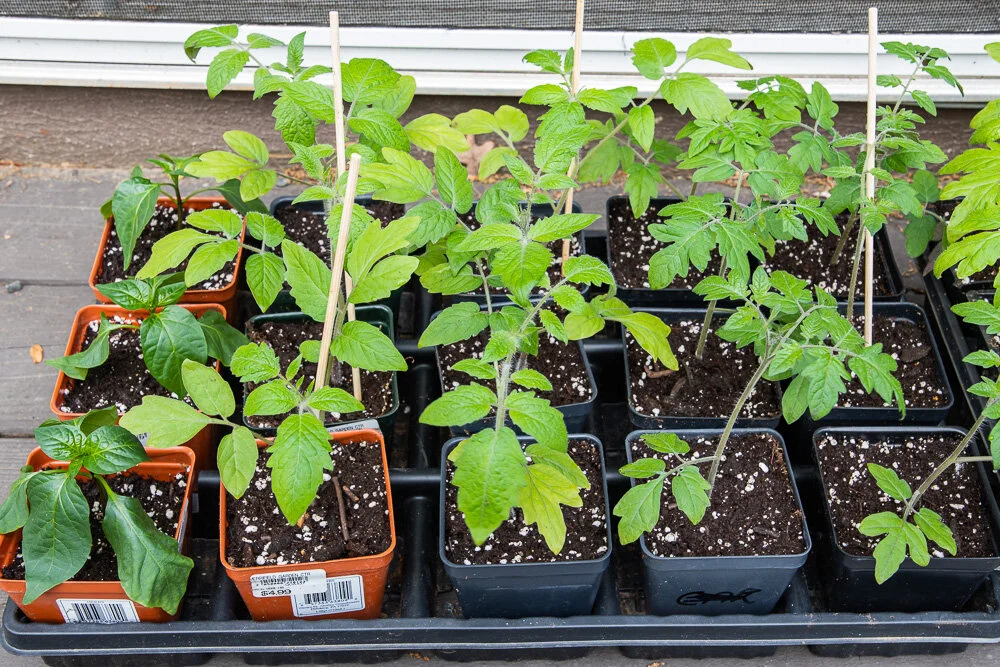
If you have started seeds already, some may already need re-potting.  I started three types of lettuce seed on 2/2 with the idea that I’d put them out in our new cold frame.  The photo shows what one of the six packs looks like after 26 days!

Six pack of lettuce seedlings 26 days after planting.

Six pack of lettuce seedlings 26 days after planting.

I re-potted the seedlings into 3” plastic pots (which I cleaned with a 10-1 water/bleach solution) to give them more room to grow.

Lettuce seedlings just transplanted into larger pots.  The smallest ones were nearly covered by the larger plants in the six packs.

Lettuce seedlings just transplanted into larger pots.  The smallest ones were nearly covered by the larger plants in the six packs.

After just a week of growth under the lights you can see how much bigger the plants have gotten!

Photo taken on 3/7 showing the rapid growth of the re-potted plants.

Photo taken on 3/7 showing the rapid growth of the re-potted plants.

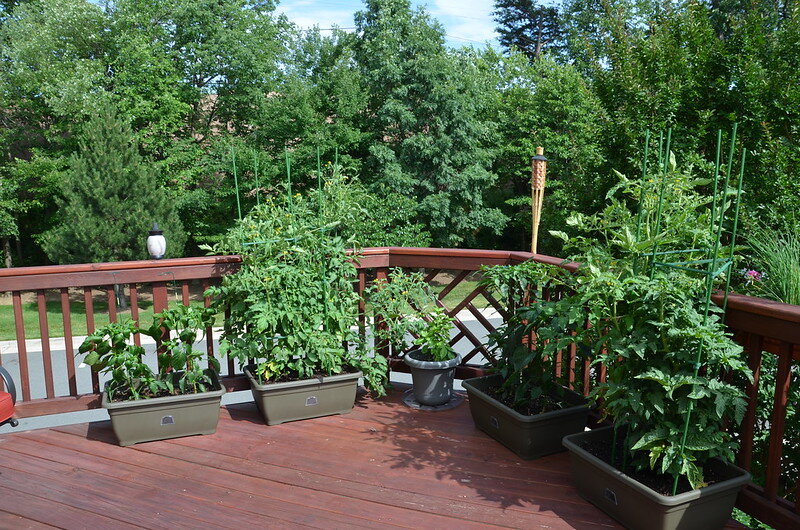
This week, as the weather warms, I’ll harden off the larger plants and after 4 or 5 days plant them into the cold frame.  You’d probably want to wait until early April before planting them directly into the garden as we still have a way to go with frosts and freezes.

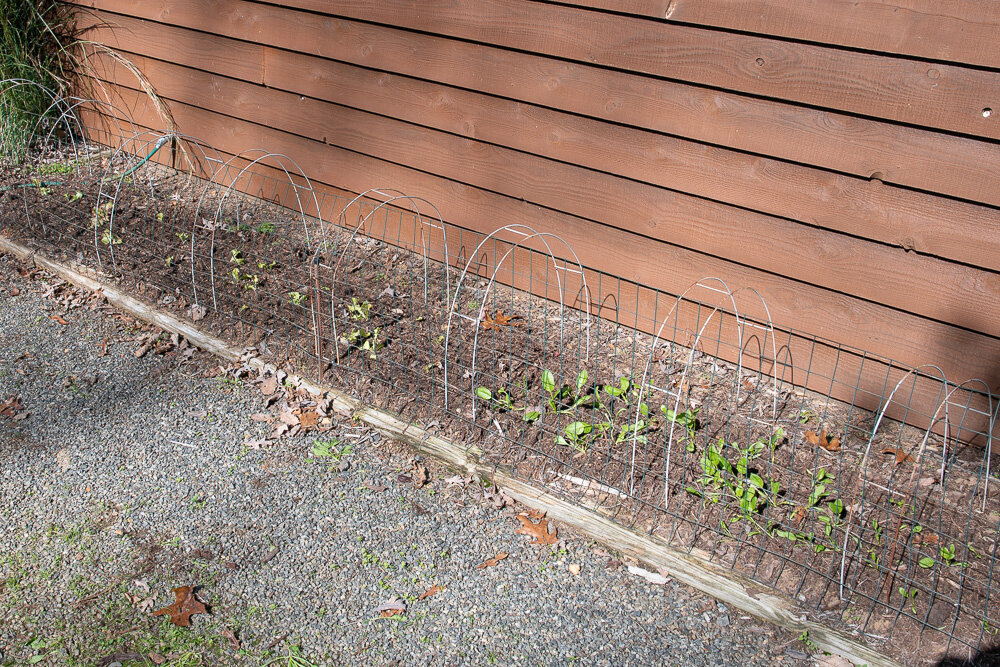
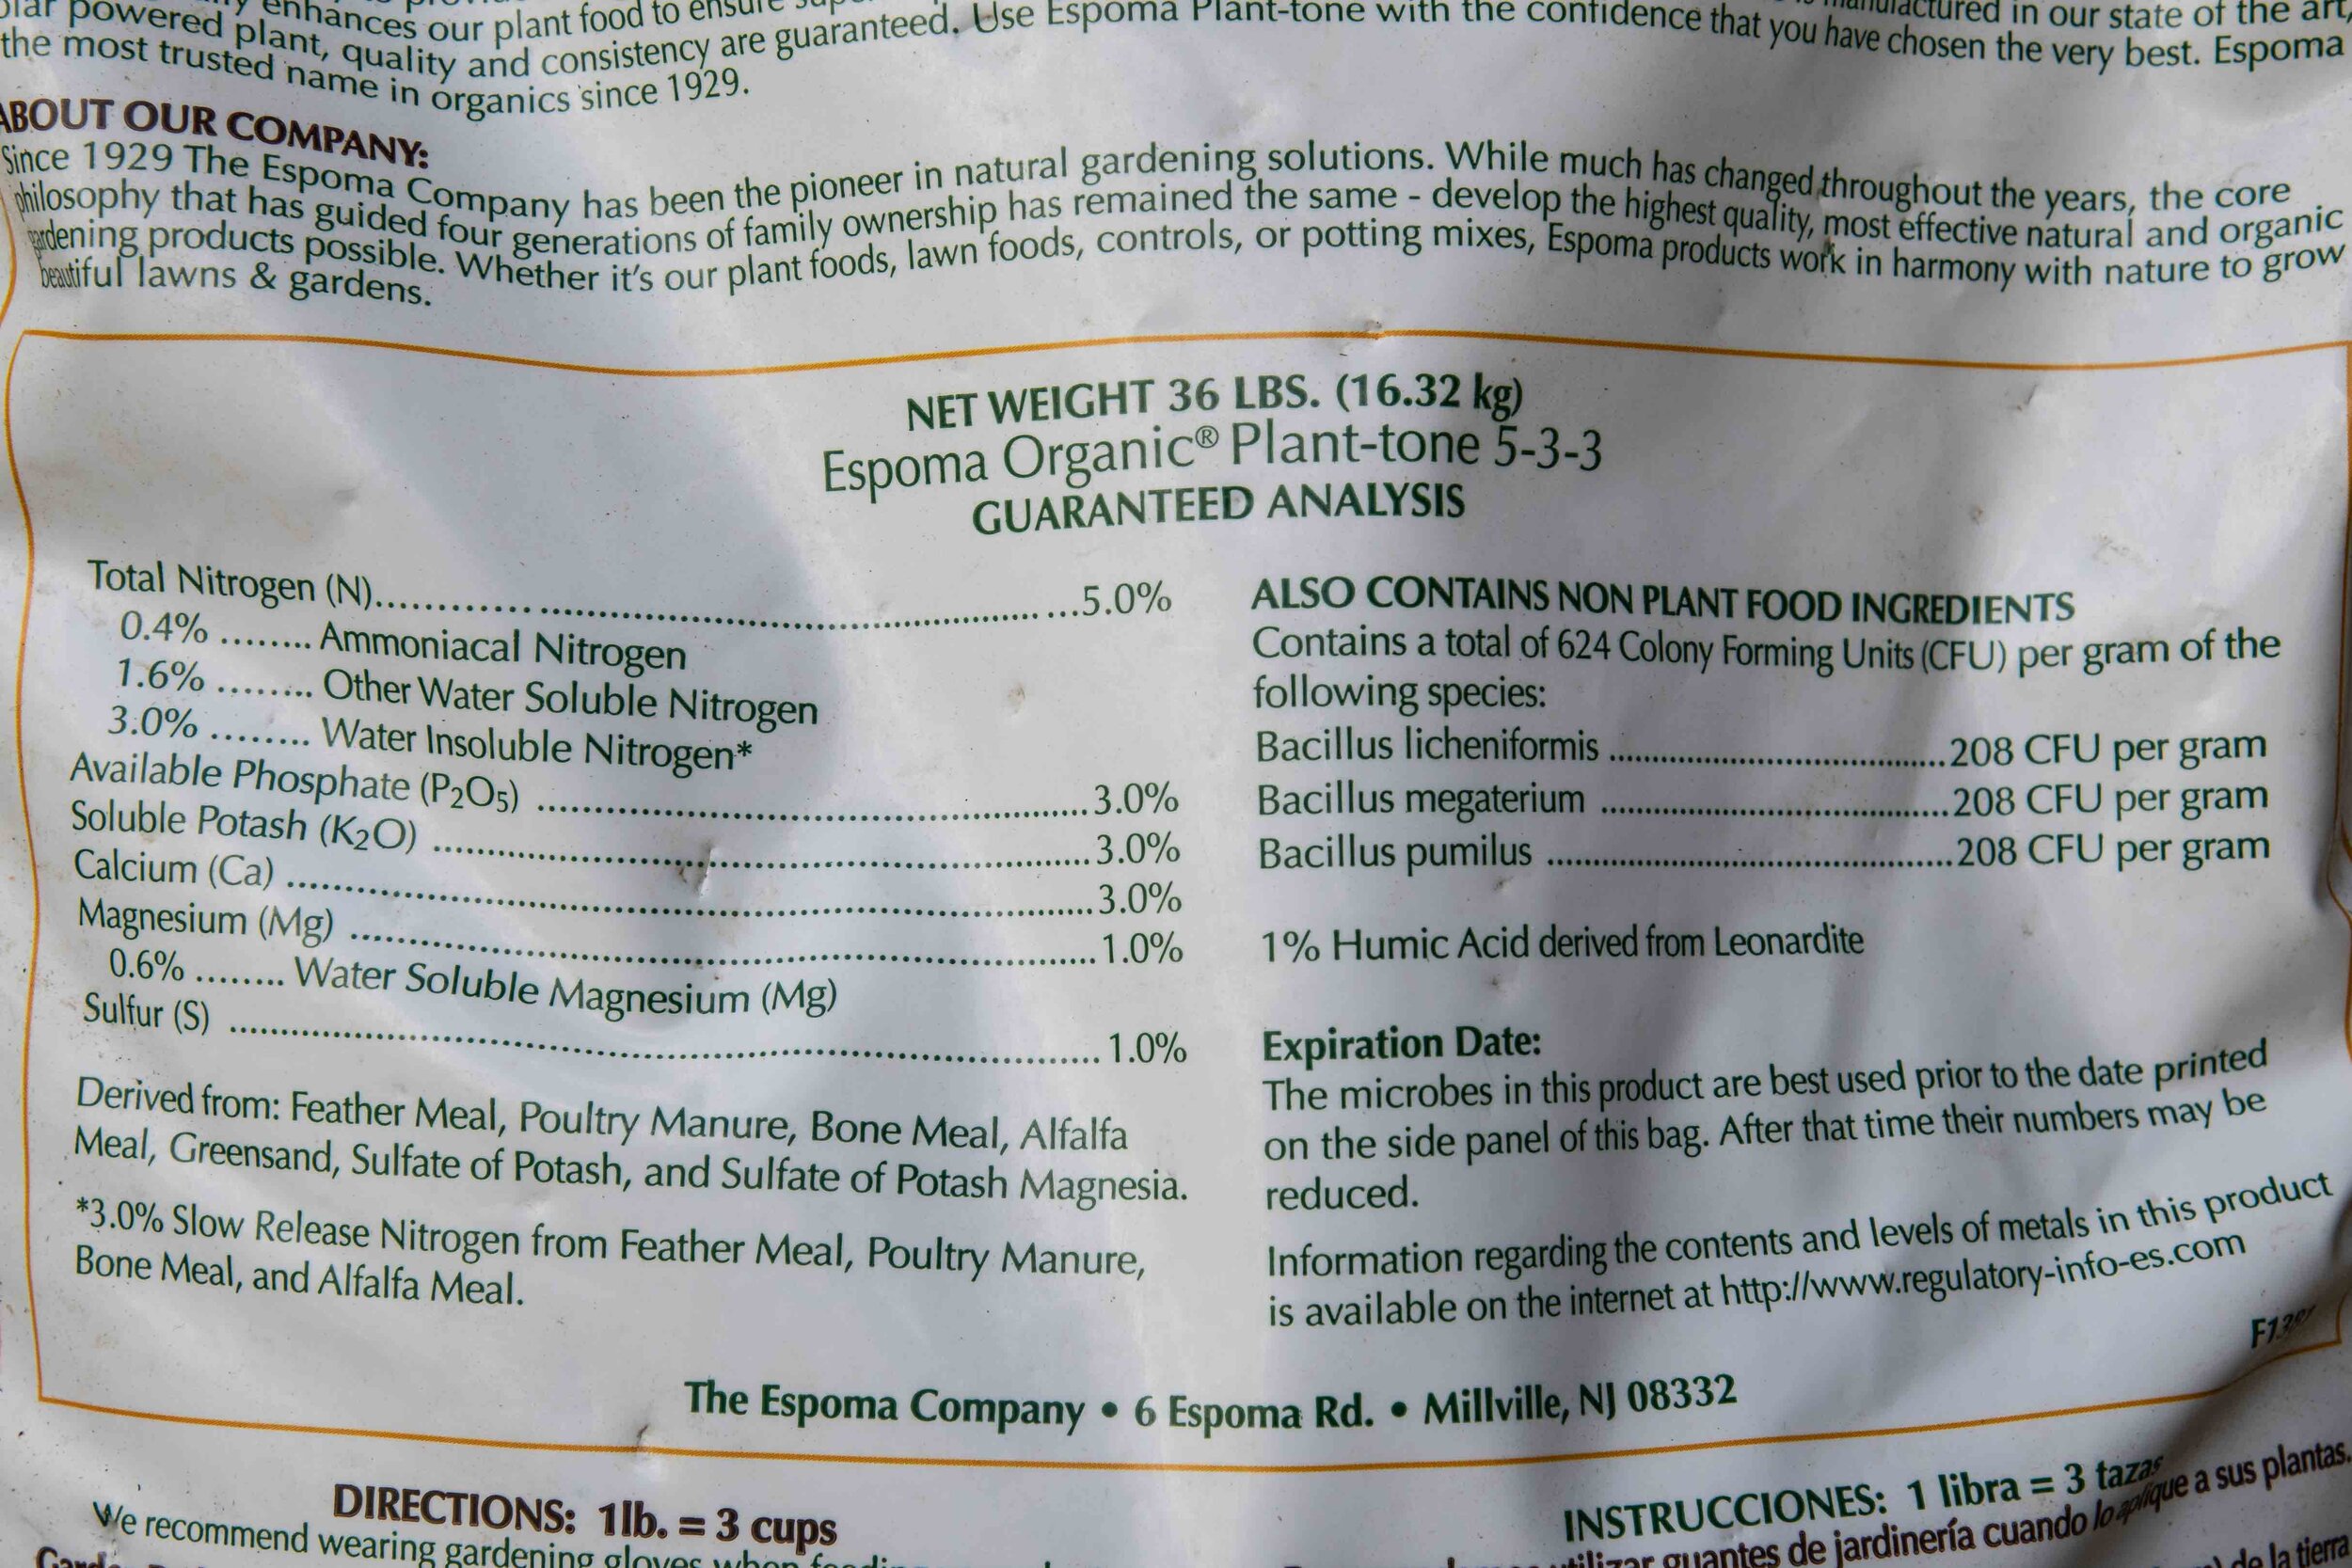
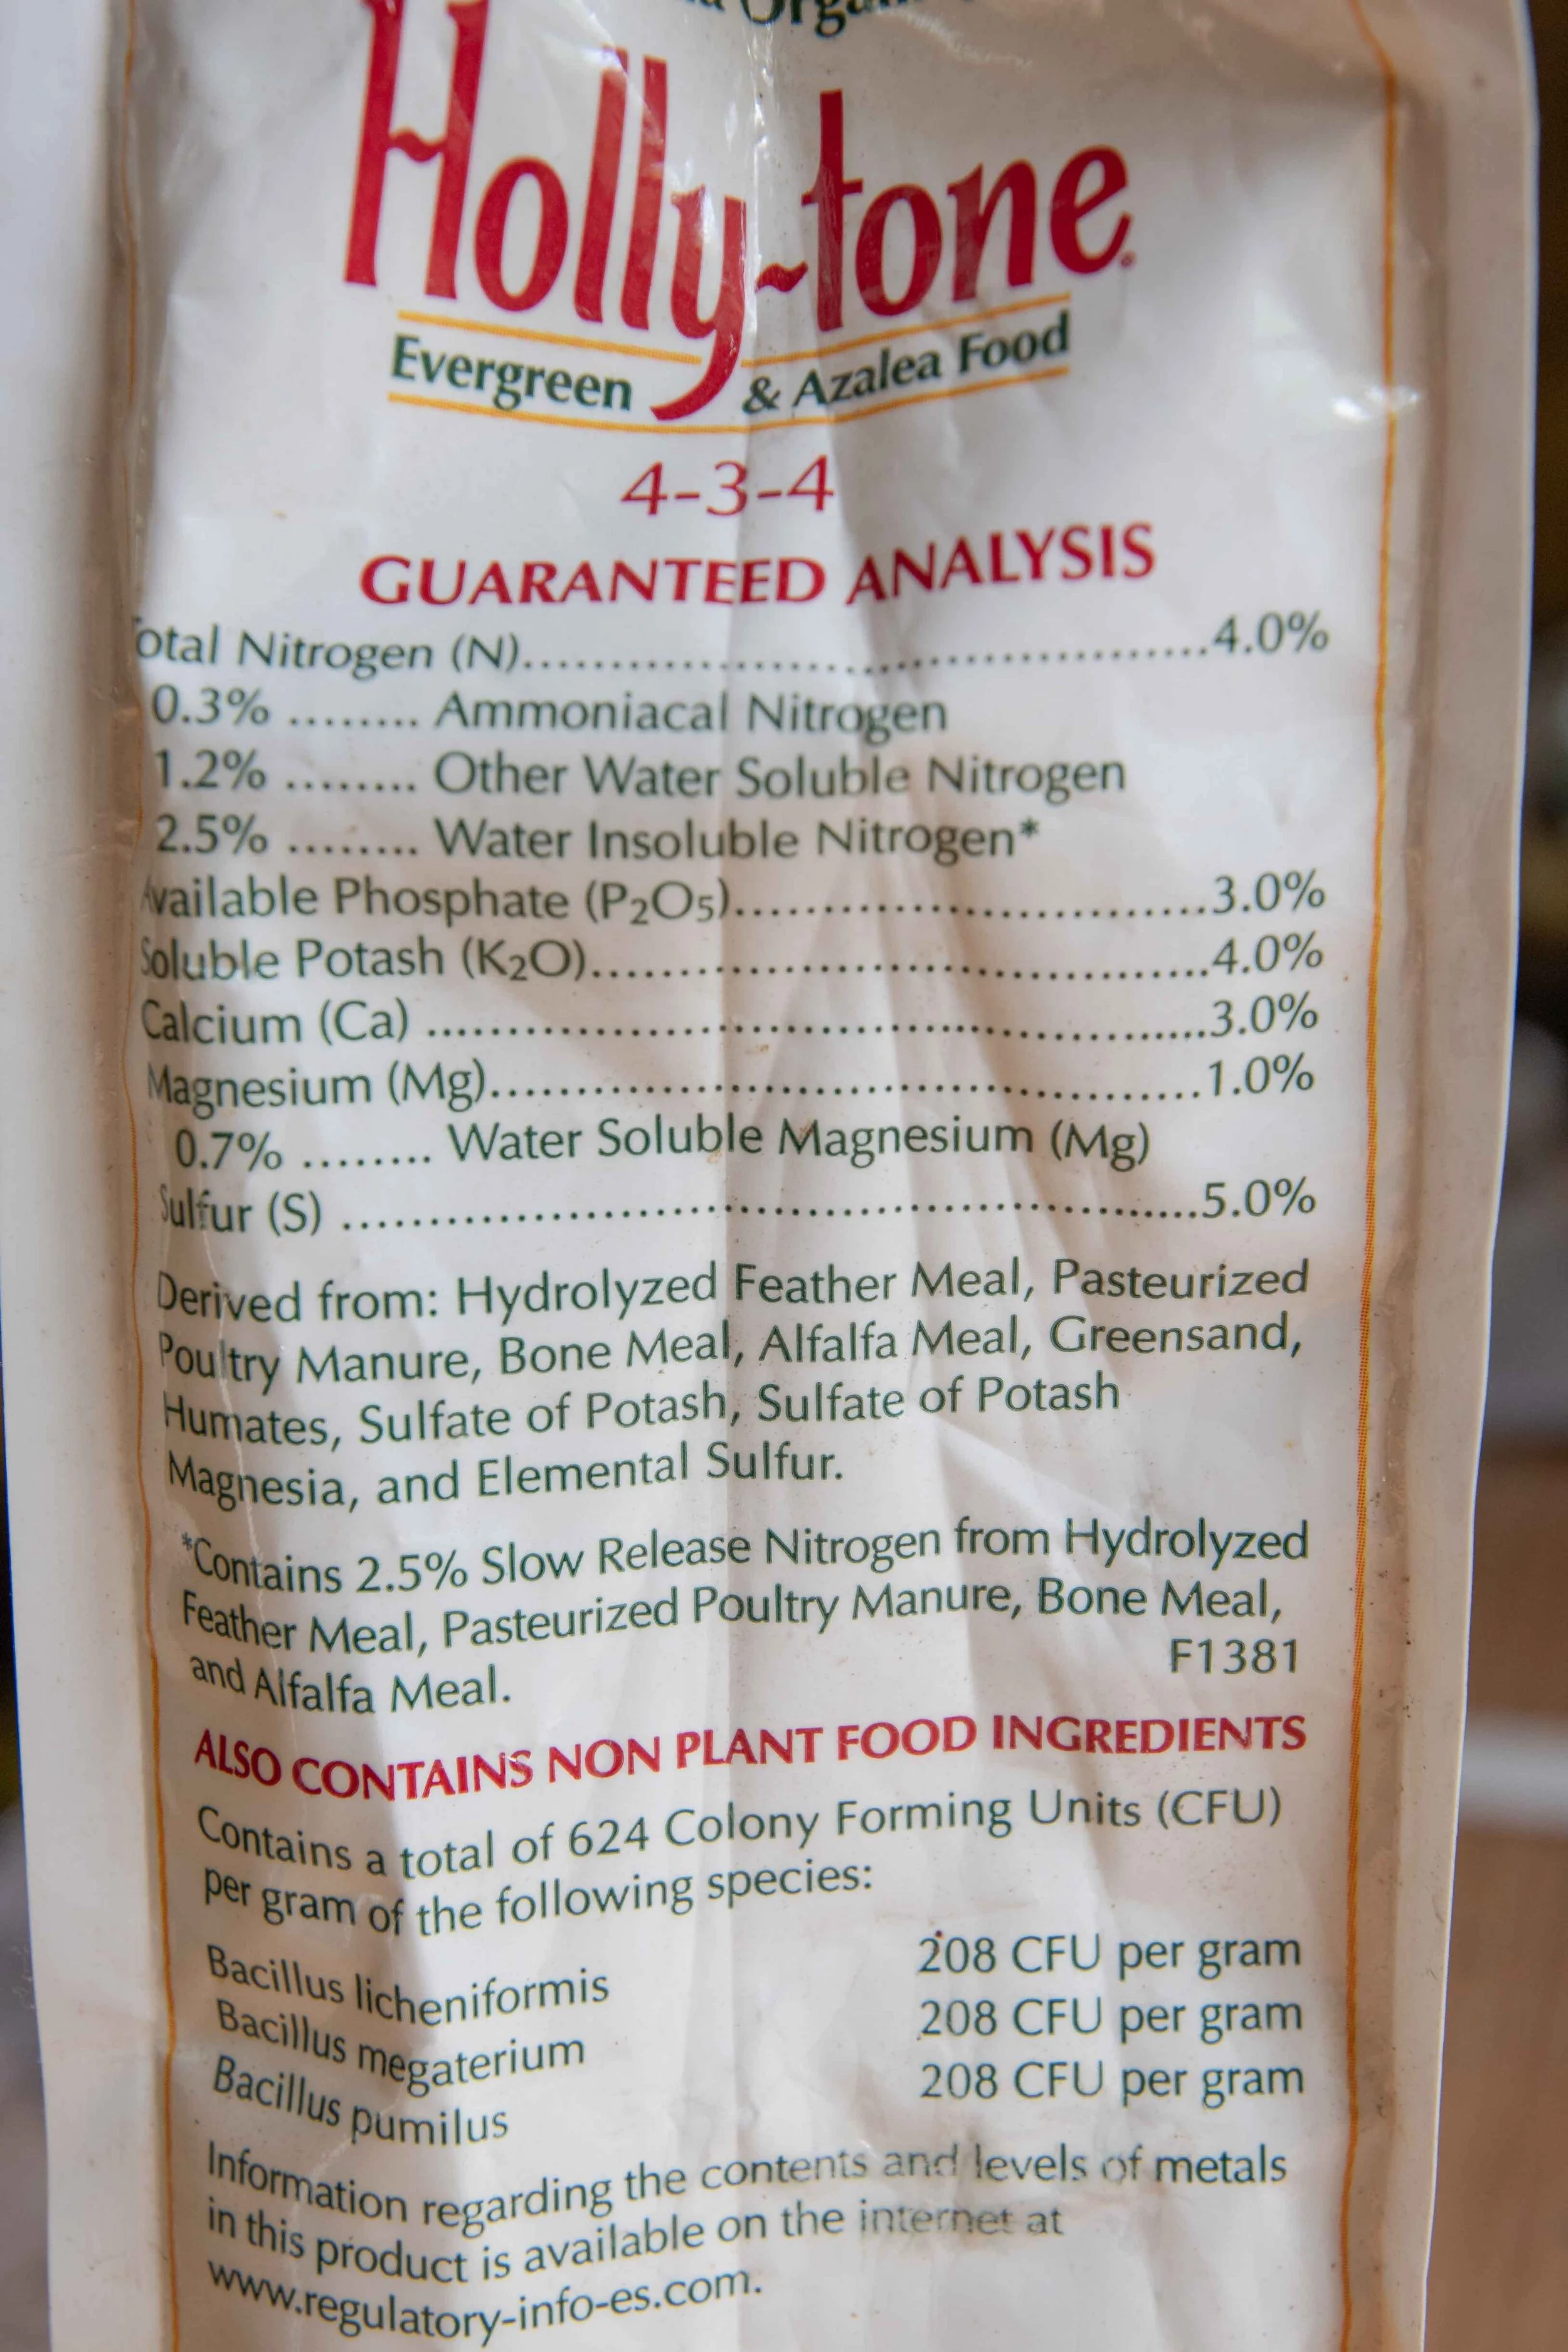
If you have any fall lettuce or spinach remaining in your garden or in a covered bed now is the time to fertilize them to promote new growth.  We were successful this winter and had both lettuce and spinach grow under a covered bed.  Fall spinach grown un-covered also did well and I’ve fertilized all of them in the past week.

It’s time to plant peas, spinach and garlic and onion sets.  Pull any weeds you find in your beds, add some all purpose fertilizer and then plant your seeds according to the instructions on the back. This is a good time of year to re-discover the Virginia Cooperative Extension website ext.vt.edu.  They have lots of information about growing many vegetables and a helpful chart that shows when to plant based on your area’s average last frost.

Out in the flower garden my wife is busy cutting back perennials whose growth from last year has died back.  It’s a good idea to clean out the beds of last year’s growth and fallen leaves and apply a new coat of mulch around the plants.  February is usually a good time to prune deciduous shrubs and trees, but you can still prune plants that need it.  The sooner the better, as many plants will start moving the sap up into the branches as the days warm and you want any cuts you make to heal before that occurs.

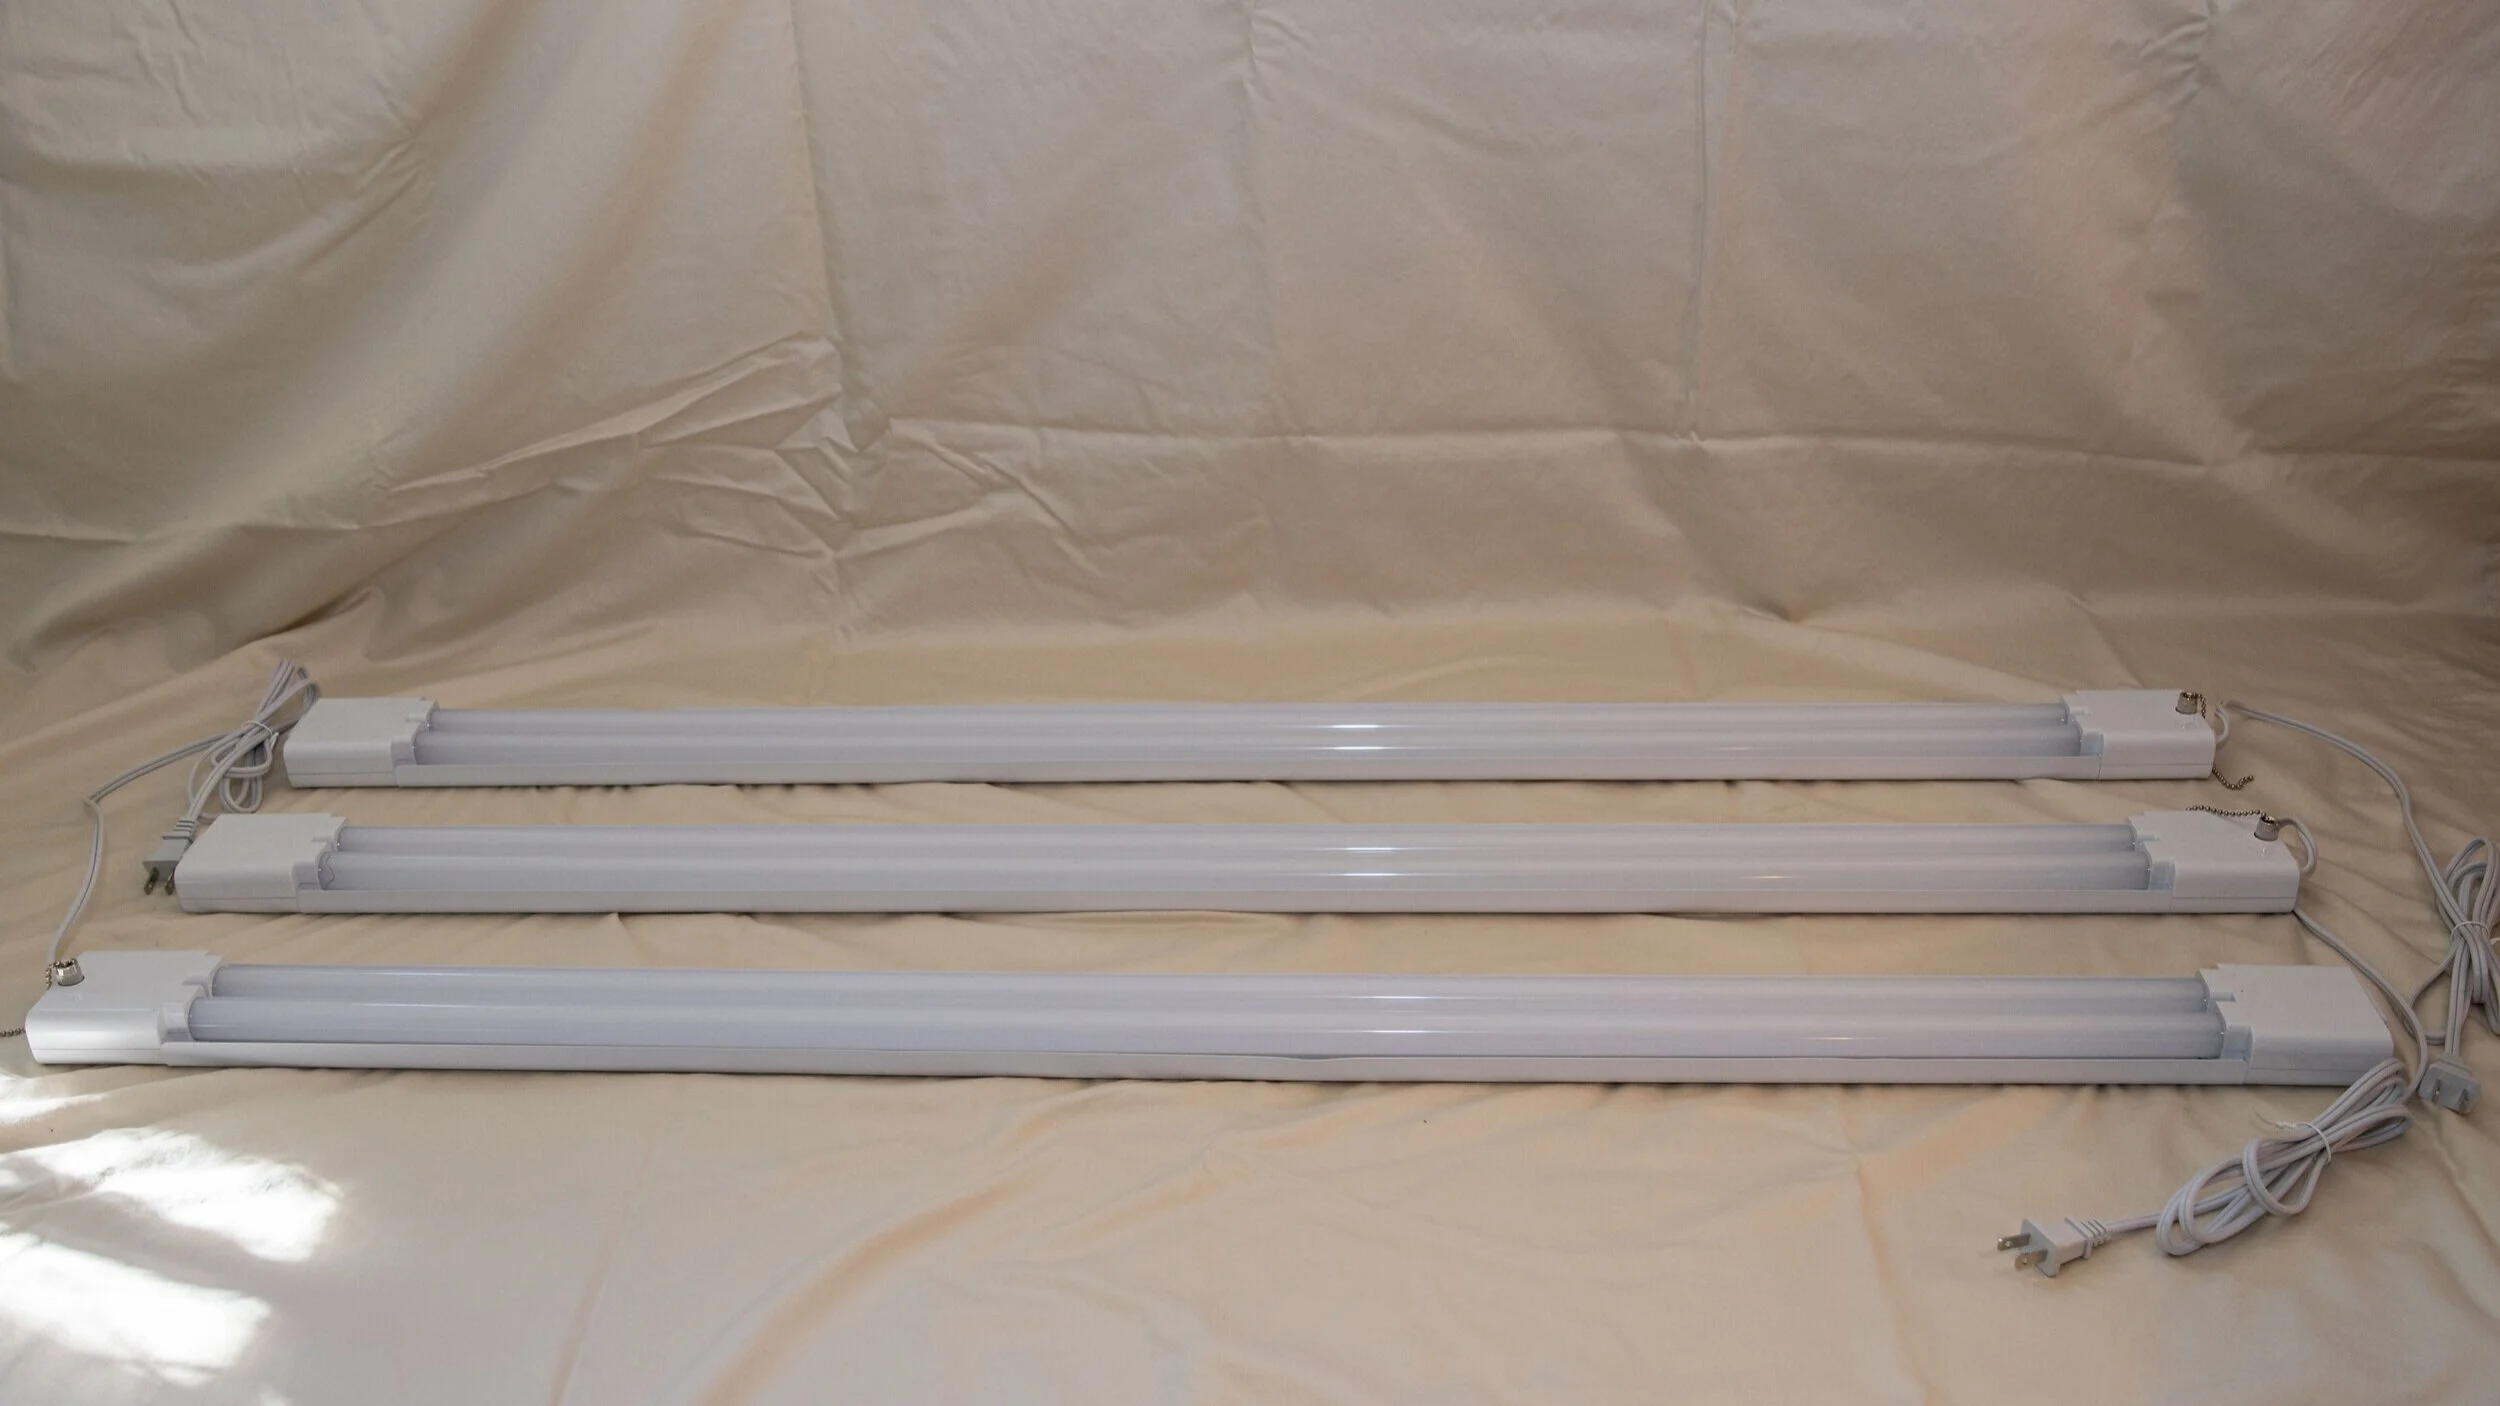
You’ll probably notice that the lawn is starting to green up, so there are several things you can do now to help the grass grow.  Thatching and aerating can be done now, and I’ve purchased pelletized lime that I’m going to spread later in the week before it rains.  Many people have professions do the thatching and aerating, but just a vigorous raking session with your leaf rake will get up a lot of the old dead growth and allow for better growth this spring.  If you plan to use a preventative weed killer for crabgrass, that should be applied around the time that the forsythias are blooming.  Fertilizing is really best in fall, but if you have problem areas you can do some fertilizing in spring.  It’s probably best to wait until April for that, as we’ll still see some cold weather before the month of March is finished.

Any questions, e-mail me at marklevisay@gmail.com  Happy spring!

Cutting back buddleias in late winter

by Mark Levisay

Today I’m going to go through a quick description of how we cut back our buddleias (butterfly bush) in late winter.  February and early March are a good time to prune or cut back most perennials as the sap has not started to run yet.  This also applies to fruit trees, and even grapes.  If you wait until the weather is warmer, the plants may lose precious moisture at the places you make your cuts.  I’m going to use buddleias as an example, since I did this yesterday (2/26) and took some photos while I was at it.

Buddleia bush before pruning.

Buddleia bush before pruning.

Buddleias are slightly different than a lot of other perennials in that their upper branches have not been killed back by frost.  They stay remarkably green all winter and will start growing from any of the existing green growth when the weather warms.  You can just leave them, but we usually cut them way back, and then pinch back the new growth multiple times to make the plants bushy and to produce more flowers.  With other perennials cut the dead growth down to just above any green shoots you see just above the soil.

Closer look at the dense green growth near the base of the plant.

Closer look at the dense green growth near the base of the plant.

This photo shows where we are going to focus our pruning efforts.  There are a lot of green shoots around the base of the plant, and each will become a branch supporting multiple flowers (which the butterflies love!).  Using sharp by-pass shears or loppers, cut each existing branch just above the node (the point on the branch where the shoots emerge) right above the top shoot you want to save.  This is a chance to create a nice rounded form for later uniform plant shape.

This is what the plant looks like after pruning.

This is what the plant looks like after pruning.

Each of the remaining shoots will now be ready to start their growth into new branches when the warmer weather arrives.

Closer look at one of the pruning cuts with the shoots that will become branches this year.

Closer look at one of the pruning cuts with the shoots that will become branches this year.

As the new growth begins, pinch back many of the new shoots.  This not only makes the plant bushier, but it will produce more flowers and help you continue to shape the plant.  I’ll go into this process in more detail later in the spring when I can take some photos while I pinch back the plants.

As a side note, we haven’t had any trouble at all with deer bothering the buddleias, even though they are one of the few plants with green leaves during the winter months.  Add to that their value in attracting pollinators like butterflies to your garden and I think we have a real winner here!

Any questions please feel free to e-mail me at marklevisay@gmail.com  Good luck!

Indoor seed starting: update and tips for success

by Mark Levisay

It’s been two weeks since I planted my first seeds indoors under my new LED lights and I thought I’d give a quick update on  the progress so far.  Basically all of the seeds have germinated, though I’m still hoping to see a couple more vincas show up that haven’t poked through yet.  I planted three varieties of lettuce and they were the fastest to germinate-all in 4-6 days.

A 6-pack of lettuce seedlings.  The two on the left are “New Red Fire” and already show some of their red coloration.

A 6-pack of lettuce seedlings.  The two on the left are “New Red Fire” and already show some of their red coloration.

Since they germinate quickly they are also the first to display the adult leaves.  I am pleased to see that the seedlings are growing low to the soil and in a very compact manner.  This indicates that my new lights are giving them plenty of light for optimal growth.  In dim light the seedlings would be tall and spindly, growing toward whatever light they could find.

Starfighter leaf lettuce seedling.

Starfighter leaf lettuce seedling.

Now that the lettuce have started to produce their adult leaves I’ll begin to fertilize them, since the seed starter soil doesn’t contain any fertilizer of its own.  This week I’ll add a small amount of a liquid soluble fertilizer (ex. Miracle Gro) to my watering can, and water the lettuce plants with that.  I won’t begin to fertilize the pepper or vinca seedlings until they start to display their adult leaves.

Two pepper seedlings.

Two pepper seedlings.

The peppers and vinca seeds took almost two weeks to germinate, though some started to appear about ten days after planting. I usually plant two seeds in each starter cup, and as you can see in the photo, both have germinated.  I’ll wait about a week, until all of the seedlings have emerged, and then thin the seedlings, leaving the strongest one in each cup.

Vinca seedlings.

Vinca seedlings.

Unlike the peppers, when I have two vinca seedlings in a cup, I’ll let both seedlings grow.  These plants won’t grow nearly as big as the pepper plants, and my wife will either plant the resultant “twin” as it is or split them at planting time.

If you’ve planted multiple seeds in your starter cups, and a few haven’t come up, this is a good time to move some around.  I use a pocket knife to dig a narrow but deep hole in the empty cup, and then “prick out” one of the multiple seedlings from another cup.  Insert the seedling’s long tap root down into the hole, press the soil in around it, and water well.  This way you can have at least one seedling in each cup.

Now that we’re at the mid-point of February, it’s time to start thinking about planting brassica seeds for planting out in the garden in early April.  Cabbage and broccoli seeds germinate quickly, but will take 4-6 weeks to mature indoors.  Then plan for a week of hardening off outside before actually planting in the garden.

March is the time to start tomatoes, basil and peppers

It’s still not time yet to plant warm season seeds like tomatoes and basil, or most peppers.  Early March is a good time to plant pepper seeds, as they take almost 2 weeks to germinate and about 6 weeks to mature indoors.  Basil is similar, though they germinate more quickly but take longer to mature.  Tomatoes germinate in a week or less, but still require 4-5 weeks of indoor growth before hardening off.  Start those seeds in mid-March, with a goal of having them hardened off and planted in the garden around the middle of May, after our average last frost date.

Any questions, e-mail me at marklevisay@gmail.com  Good luck!

Starting seeds indoors

by Mark Levisay

In spite of the snow we’ve had recently this is a good time to think about starting garden seeds indoors.  You may have a favorite variety of a vegetable or flower you can’t normally find at a garden center and planting them from seed may be your only option.  Generally you can get a wider range of varieties of plants available in seed form, so learning to start them indoors is a good idea.  It may take anywhere from six to eight weeks for the seedlings to be ready to harden off (more on that later) and germinating time might be up to two weeks, though many are much faster.  Now is the time to plant seeds for plants you want ready for the garden in early April-things like broccoli and cabbage.  Peppers and tomatoes can wait until March.

There aren’t too many things you’ll need to start seeds indoors, but good lights are probably the most important.  Few homes have large south facing windows which might provide enough natural light for seed germination and growth.  Better to invest in bright artificial light that you can place anywhere that you have space for a table.  Today LED lights are probably your best bet, as they are lightweight, bright, use little electricity and last a long time.  They usually are available in daylight spectrum light which is optimal for plant growth.  In my last blog I detailed making my new three fixture LED which is 4’ long and can cover four “flats” of plants.  If you don’t have that much room a 2’ long fixture would cover one flat and that might be all you need.  You’ll want to hang them about 6-9” above the soil level of the pots you’re using and then be able to raise them as your plants grow.

You can use any kind of tray or pot for starting seeds as long as it has drainage and has been disinfected.  You shouldn’t have to clean newly bought pots, but if your pots have been used before clean them thoroughly with a mixture of 1 part bleach to 10 parts water and let dry before filling with soil.

Two types of plastic “6-packs” used for seed starting.  The larger fit 6 to a flat, where the smaller go 12 to a flat.

Two types of plastic “6-packs” used for seed starting.  The larger fit 6 to a flat, where the smaller go 12 to a flat.

Currently I’m using the larger sized cups for plants that will be under the lights for quite a while.  Later on I’ll use the smaller cups for things like tomatoes and peppers that will germinate and go outside pretty quickly.  I also use a large flat tray under my plant flats to keep excess water from pouring onto the floor.  This tray actually came from under the air handler in my heat pump system.  This had cracked and needed to be replaced.  I rescued and re-purposed it for plant duties.  Any other flat, rimmed tray will work, or even an old towel placed on your table under the flats.

The soil you use in your plant pots is important—you don’t want it to contain any real nutrients for the plants and most general potting soils contain slow release fertilizer.  Instead, use seed starter potting soil specifically designed for the job.  Espoma, Jiffy, and Miracle Gro all sell these.  I’ve had trouble wetting the Jiffy Mix thoroughly, so I usually use the Miracle Gro Seed Starter mix. Espoma is a good option if you are looking for an organic product. If you do buy the Jiffy Mix, put it in a bucket and soak it in water until it is thoroughly wet.  Squeeze out the excess water before filling your pots.  Never let the soil dry out, as it can be hard to re-wet, and seeds need constant moisture to germinate.  You won’t need to add fertilizer until after the seedlings get their first set of adult leaves, and at that point you can use a liquid soluble general purpose fertilizer when you water.

Labels are really important, especially if you’re growing several varieties of the same plant, as all of the seedlings will look the same, and it’s easy to get confused.  Some of the plastic 6-packs will come with plastic labels, but you can also make your own.  Popsicle sticks, tongue depressors or even strips of cardboard will do.  If you re-use them from year to year it’s a good idea to disinfect them with your 10-1 bleach solution.

Now let’s go through the procedure I use to plant the seeds.  First, I fill the cleaned 6-packs with seed starter soil, level to the tops.

6-packs filled with dry seed starter soil

6-packs filled with dry seed starter soil

My second step is to put the packs in the driveway and water them with a watering can to thoroughly soak the soil.

6-pack after watering

6-pack after watering

You’ll note that the watering process compacts the soil slightly in the cups, giving you space to add seeds.

Next I’ll bring those wet 6-packs back in the house and put them under the lights, which at this stage really help you see what you’re doing!  I label the 6-packs, or even the rows within them, and then place seeds into the cups.  I generally put 2 seeds in each cup, and later thin out one if both germinate.  With some flowers I let 2 plants grow and then separate them when planting.  Press the seeds down lightly so that they make good contact with the wet soil.

6-pack with labels and pepper seeds

6-pack with labels and pepper seeds

Next, I’ll cover the seeds with a small amount of the seed starter mix and water it.  Some seeds need light to germinate (for example coleus and statice) so check your seed packs for specific instructions.  Seeds only need to be covered to about their own thickness, so this isn’t much soil and I use a spray bottle rather than a watering can, as the spray disturbs the seeds less.

6-pack with seeds covered, and spray bottle ready for the next step.

6-pack with seeds covered, and spray bottle ready for the next step.

Now for the waiting, as some seeds can take up to two weeks to germinate.  Keep them moist at all times.  Some people cover the moist flats with “Saran” plastic wrap to hold in the moisture.  Some seed trays will come with clear plastic covers used to keep in moisture.  I just use my spray bottle multiple times each day to keep the soil moist.  Once the seeds germinate  you can switch back to watering in a more conventional manner.  Use the light from dawn to dusk, but don’t run them 24 hours a day.  Keep the trays in a warm but not hot area of your home.  I keep my house at 68F and have never had a problem.  I have also started to use an oscillating fan on the other side of the room to simulate nature’s breezes, as I think this makes the plant stems stronger.

My light table set up with a flat of planted and watered seeds.

My light table set up with a flat of planted and watered seeds.

Once the plants are up you may need to raise the lights so that you’re always 6-9” above the tops of the plants.  When the plants have grown for a while, they’ll start to look more like the ones you might see on sale at The Corner Store.  Now it’s time to “harden off” which is the process of acclimatizing the plants to the great outdoors.  Place them outdoors in a shady area, and each day give them a few hours of sun, increasing the amount each day for a week or until they’re in full sun.  Keep them well watered, as the little plants are not used to this outdoor stuff.  If it looks like rain you may want to put them under cover, as often a heavy rain will knock over the young plants.

Give this a try, and before you know it the process will be second nature.  If you have any questions please e-mail me at marklevisay@gmail.com.  Good luck!

Building a LED seed starting light

Last fall I decided to re-build my seed starting light using brighter and more energy efficient LED lights.  My original light consisted of two 2-bulb 48” fluorescent “shop light” fixtures hanging in a wooden frame with chains so the height of the lights could be adjusted.  Each February, I set up a folding table and position the light frame on top to begin seed starting for the year.

This set up had always worked well, though the fluorescent bulbs seem to dim with time, and then pose a disposal hazard due to the mercury inside them.  Using modern LED lights promised a reduction in energy use and a long life span.  I ordered a set of four Freelicht brand 45W, 4500 Lumen, 5000K (daylight balanced) 2 bulb 48” LED light fixtures from Amazon.com which cost about $75.  Once they arrived I immediately installed one fixture in my workshop to see how it worked.  I was pleased to find the fixtures light in weight and obviously brighter than the fluorescent light they replaced.

My original light hanging frame, made from 1x2” lumber is 53” long and 36” high, plenty of room for the 48” light fixtures and space for 4 standard plant flats. The frame sits on top of a folding table I set up each February for the seed starting se…

My original light hanging frame, made from 1x2” lumber is 53” long and 36” high, plenty of room for the 48” light fixtures and space for 4 standard plant flats. The frame sits on top of a folding table I set up each February for the seed starting season.

Now, how to link together the three light fixtures?  The lights each come with 2 short cables with an eye on one end and hook on the other, which made it easy to install the fixture to the rafters in my workshop.  The lights also are built with a typical “keyhole” for mounting on a screw flush to a surface on each end, and I decided to try this route.

The 48” lights each come with a cord, pullchain style switch and a receptacle to allow lights to be linked together.

The 48” lights each come with a cord, pullchain style switch and a receptacle to allow lights to be linked together.

I cut two pieces of 1x2” lumber into 22” lengths and carefully measured the center of each, and then 9” on either side.  I drilled pilot holes and then inserted #8 x1” wood screws into the holes, leaving just enough space to be able to insert the screwheads into the light fixtures.

The 48” lights each come with a cord, pullchain style switch and a receptacle to allow lights to be linked together.

The 48” lights each come with a cord, pullchain style switch and a receptacle to allow lights to be linked together.

To keep the light fixtures from sliding around and falling off the screws I used clear silicone sealant as an adhesive to “glue” the light fixtures to the boards.  The silicone is not a super strong adhesive, so I can break the bond and change the light spacing later if I need to.

Closer look at the silicone holding the board in place on the light fixture.

Closer look at the silicone holding the board in place on the light fixture.

Once the silicone adhesive has set up I was able to turn the light assembly over and attach 2 eyehooks to the top center portion of the boards.  This will allow me to attach the lights to my hanging frame with two lightweight chains.  The chains allow the light to be lowered or raised depending on the size of the growing plants.

Three light assembly with eyehooks ready for hanging.

Three light assembly with eyehooks ready for hanging.

Now for the finished product!  When I mounted the three light fixtures to the boards, I made sure to reverse the middle fixture so that two of them could be plugged into each other.  This allows just one light to be plugged into the plugstrip on the hanging frame, and I can use the plugstrip switch to control all three lights at once.  The only final adjustment I had to make was to add 2 large washers to the top of one light fixture as balancing weights to get the overall setup to hang level.

Finished light assembly hanging in frame and all lit up!

Finished light assembly hanging in frame and all lit up!

Now I will set up my folding table and I’ll be ready to start some seeds!  I usually start my first seeds indoors on Groundhog’s Day (2/2), so it won’t be long.  Next time I’ll write about the details of that process, what seeds I start that early in the year, and give you an update on how the new lights are working out!

Any questions feel free to contact me at marklevisay@gmail.com.

Fall garden clean-up

by Mark Levisay

As we get closer to (some may have already had) the first frost it’s natural to stop thinking about your garden and start thinking about the upcoming holidays.  Why should I spend extra energy on the garden when my plants are all dead, or about to be?  In addition to making it look better, there are several reasons to do a good cleaning throughout the garden.

Weeds, disease and pests aren’t done yet

Weeds grow nearly year round, and there may be quite a few hiding among the remaining plants in the garden beds, or along the garden’s borders.  If they’re blooming they are trying to set seeds for next year’s weeds, and it’s easier to prevent that from happening than to fight them in the spring.  Pulling all of the weeds you can reach will help minimize the amount of weed seeds present next spring.  Consider spraying weeds in hard to reach places or borders with herbicide if you can’t pull or dig them up.

Hot peppers will continue to produce until frost, so they'll get cleaned up after that.

Hot peppers will continue to produce until frost, so they'll get cleaned up after that.

Plant diseases, especially the bacterial and fungal diseases so common in the tomato patch, are hard to treat on the growing plants.  One way to minimize their damage is to remove all of the diseased plant material from the garden.  Think about this stuff as if it were contagious, because it is.  Take all of your spent tomato plants, including dry leaves that may fall off, and remove it from the garden, the farther the better.  Don’t put this in your compost if you expect to use that compost in the garden in the future.

Insect pests often overwinter, or lay eggs in the plant material that they feasted on during the growing season.  Removing the plant material helps cut down on the insects next spring, especially if you dispose of (compost, burn, throw away) the infested plants.

A little prep for next year will pay off

Once you have cleaned off your beds it’s a good time to spread a layer of compost or mulch on the beds.  This layer of organic material will help you in several ways.  The added organic material will help suppress weed seed germination and growth while improving overall fertility.  The added material also feeds and protects small organisms like worms that live in the beds and will help incorporate the organic material into the soil.

A weeded and composted bed ready for winter. The asparagus bed behind it will soon get cut back and covered in a thick layer of compost.

A weeded and composted bed ready for winter. The asparagus bed behind it will soon get cut back and covered in a thick layer of compost.

If you have an asparagus bed frost will kill off the ferny green growth.  After it turns brown, cut all of the “canes” back to ground level, and put that on the compost heap.  Cover the bed with a thick layer of compost and/or mulch.  This will suppress weeds and feed the asparagus crowns which overwinter in the soil.  In the spring you’ll be ready to enjoy the fresh spears as they appear in April and May!

Fall is also a good time to look at your garden infrastructure and fix any problems you’ve encountered during the growing season.  Does water pond up after a heavy rain in your beds or on the pathways?  Fixing drainage problems now will help get your beds ready for spring planting.  I mulch my paths just to keep the mud in check during rainy periods.  If your fencing has holes, or doesn’t always contact the ground, it’s time to fix that too.

Protect fall vegetables

If you’re growing fall vegetables it’s a good time to cover them, if you haven’t already.  Brassica crops should have been covered all along to prevent insect infestation.  Things like lettuce and spinach will need some protection from hard frosts so those rows should get covered soon.  Weed the beds well before you cover as it’s much harder to do once the cover is on!

A bed of fall spinach and lettuce ready to be covered.

A bed of fall spinach and lettuce ready to be covered.

With just a little work now, before it gets too cold, you’ll be set up for an early start with spring planting in 2021.  Good luck, and happy holidays!

You can e-mail me with any questions at marklevisay@gmail.com.

Planting fall vegetables

by Mark Levisay

August is an excellent time to think about what you may be able to grow as the weather cools and days grow shorter.  Many vegetables that you typically plant in spring, or even summer can be successfully grown into the autumn.  In many ways this is just a continuation of succession planting by taking advantage of bed space that may now be available after harvesting summer crops.

Brassicas for fall harvest

Some potential fall crops are broccoli, cabbage, cauliflower, Brussels sprouts and kale (brassica family).  All of these will generally appreciate the cooler weather ahead, and Brussels sprout’s flavor will actually benefit from a little frost.  These vegetables should soon be available as bedding plants at local garden centers.  Buy healthy looking plants and check closely for cabbage worms or egg masses, as these pests are active in warm weather.  I also highly recommend using a row cover to help prevent pest infestations, which will occur up until we have frost.  If you want to start these plants from seed, start right away, as they won’t be ready to transplant into the garden for about six weeks.

Still time to plant seeds

Many other varieties of vegetables can simply be planted from seed into any space that becomes available in your garden.  Some, like sugar snap peas, carrots or bush beans ought to go in pretty soon to assure a harvest before frost. Others like lettuce and spinach can wait until early September for planting, as they prefer cooler weather and mature quickly.  Spinach is one of my favorite fall crops, as it will survive all winter, even without much protection.  Early in the spring, as the days lengthen, it will burst into growth and provide you with fresh greens long before your spring planting of spinach is ready to harvest.  Crops like collards and turnips are very tolerant of cold weather and may grow through our milder winters.  Onions, garlic, shallots and leeks can be planted in the fall (from sets, or bulbs) and harvested in the spring.  Onion sets available now should be “short day” varieties, as you’re expecting them to grow during the shortest days of the year.

Order larger quantities of seeds, like the beets above, for fall planting and save some for your spring crops.

Order larger quantities of seeds, like the beets above, for fall planting and save some for your spring crops.

Seed availability

One problem I’ve had in late summer is seed availability.  Many seed companies collect unsold seeds from retailers in July, and you may have to search to find seeds if you don’t already have them. The Corner Store and Southern States should have some selection. You can also order seeds online from numerous seed companies and receive your seed orders in a reasonable time to plant.  I usually try to order enough seed in the spring to take care of both spring/summer and fall planting.  Many garden centers will have, if not now, soon the bedding plants or onion/garlic sets you’ll need.

A soaker hose makes it easier to provide the consistent watering that seedlings, like these green beans, need.

A soaker hose makes it easier to provide the consistent watering that seedlings, like these green beans, need.

Tips for success

For most of your fall planting you’ll be planting in a space that has already had some type(s) of plants growing earlier in the year.  It’s a good idea to completely remove all of the previous crop, and any weeds from that space, and add some fertilizer to replenish nutrients used by the previous crop.  Plant seeds as you normally would, and water frequently until they germinate.  Some of these plants may need extra watering if we go through another period of hot weather and drought.  Use row covers to keep insect pests away from brassicas and consider covering some of your lettuce and spinach as a season extender.  I’m going to experiment this fall with a covered bed of lettuce and spinach on the south side of my garage (warms well in the sun) to see how long I may be able to extend my harvest past our first frost.

With a little effort in August and September you’ll be harvesting fresh vegetables well into autumn!  Feel free to e-mail me with any questions at marklevisay@gmail.com.  Virginia cooperative extension’s website ext.vt.edu has excellent planting guides available to show you when to plant and harvest various vegetables.  In our Charlottesville/Ruckersville area use climate zone 7a.

Succession planting

by Mark Levisay

Here in central Virginia we’re blessed with a long frost free growing season.  You can usually count on the period from mid-May until mid-October to be frost free, and crops such as spinach, lettuce, kale, cabbage and broccoli can survive some frost and be growing both earlier and later.  Many of the crops we grow don’t take an entire growing season to go from planting to harvest so how do we maximize our garden’s production?  I’ll give you a few examples of what I’m doing now.

Time to pull lettuce that has bolted in the hot weather.

Time to pull lettuce that has bolted in the hot weather.

Replace finished peas

Last week I pulled the last of my sugar snap pea plants out, as the hot weather had really burned them up.  They were planted in the second half of March and took up their space for roughly three months.  In their place I added some organic material and fertilizer and planted both green and yellow bush beans.  These beans, according to the package, take about 55 days from sowing until harvest.  (This information is on most seed packets, or in the seed catalog.)  So, I should have a second crop of beans toward the end of August.

Bush green bean seeds just planted after pulling out the peas.

Bush green bean seeds just planted after pulling out the peas.

Still time for squash

Tomorrow I’m going to take the row cover off my broccoli and cabbage bed and pull those plants after picking the last broccoli side shoots. After adding organic matter and fertilizer I’ll plant a second batch of yellow squash, butternut squash and cucumbers.  Yellow squash, zucchini and cucumbers all take between 45 and 60 days from sowing until harvest.  Butternut squash will take 82 days or more but will still come in before our first frost.  I have a row of lettuce that is not liking the heat too much, and once I pull the last of them, I’ll save that space until late July.  Then I’ll plant a 3rd batch of bush beans which should mature before frost.

Broccoli plants after row cover removed. Still some side shoots to harvest before pulling the plants to make room for a row of squash plants.

Broccoli plants after row cover removed. Still some side shoots to harvest before pulling the plants to make room for a row of squash plants.

Get plants off to a good start

There are a couple of things to think about with the succession plantings.  Fertilizer will probably be required since your previous crop has used some of the nutrients during its growth cycle.  Watering every day will be required (assuming we don’t get a good rain) to ensure good seed germination.  Once the plants come up you can probably cut back on the watering a little.

Another consideration is shade caused by other crops.  You can easily plant seeds on the south side of a row of tall plants like corn or tomatoes, but the north side of that same row may be too shady now that those plants have been growing for a while.  Keep an eye out for insect pests, as they are more active with summer’s higher temperatures and may have come in to eat your initial crops.

I’ll do another post later in the summer about planting fall crops, which is just an extension of the succession planting idea.  As we head into late August and September we’ll be talking about replacing spent summer crops with cool season plants like spinach, lettuce, peas, beets, broccoli and cabbage and the use of row covers to extend your growing season.  Good luck with your new crops!

You can e-mail me with questions at marklevisay@gmail.com.  If you’re having trouble with specific crops or individual plants, it’s very helpful to have photos of the problems, so please include them in your e-mails if possible.

Pruning and tying up tomato plants

by Mark Levisay

Let’s review the pruning and tying up of tomato plants which we talked about in an earlier post.  This is something you should be doing now, in June and July to prepare for supporting heavy sets of fruit and to discourage disease later on. I recently took some photos in my garden to illustrate some of the important steps in properly training your tomato plants.

Remove tomato “suckers”

In Photo 1 you can see the development of “suckers”.  Suckers appear regularly on most tomato plants at the nodes-the place on the stem where the leaf branches grow.  Suckers can grow and produce fruit, but the plant is actually better off when you remove almost all of them, leaving only 2 to 3 main growing leaders.  Too many leaders gives you a plant that is too thick to allow good air movement, which will contribute to diseases later on in the season.  It also shades the fruit that does form and slows the ripening process.  Just snap these suckers off when you see them.  I do this every time I tie up the plants, which may be every 5-7 days at this time of year using strips of old sheets or pillowcases.

Photo 1: Suckers on tomato plant.

Photo 1: Suckers on tomato plant.

Choose leaders

In Photo 2 you can see what looks like a really robust sucker (to the left) with the main leader to the right.  These large suckers seem to occur once the plants are 12-18” high.  I allow 1-2 of these large suckers to continue to grow and become producing leaders on the plant.  These new leaders will grow suckers of their own which should be removed as they appear.

Photo 2: Choose one or two suckers to augment the primary leader.

Photo 2: Choose one or two suckers to augment the primary leader.

Photo 3: Leader and sucker tied to the support.

Photo 3: Leader and sucker tied to the support.

Photo 3 shows how I’ve tied up the main leader and the large sucker to train them both for vertical growth.  I try to tie the leader to the supporting poles right below a node where the leaf branches out, as this helps support the stem when it’s heavy with fruit.  If there are flowers present, try tying just under the flower shoot.

Provide sturdy support

Photo 4 shows an example of a tomato plant which has been pruned of its suckers and tied up to a sturdy support pole.  One trick I’ve learned over the years is to put a wood or drywall screw into the supporting pole about half way up.  This gives one of the ties something to catch, as the plants tend to slump down when they are heavy with fruit.  If the plant slumps down too much under the weight of the fruit it can crimp the main stem and cut off the plants nutrient supply.

Photo 4: Pruned tomato tied securely to strong support.

Photo 4: Pruned tomato tied securely to strong support.

Reduce soil splash

Photo 5  shows two rows of staked and pruned tomato plants, ready to support heavy sets of fruit in the coming months.  Note that this 5’ X 20’ bed allows for 2 rows of plants which can be reached from either side of the bed without walking or standing in the bed.  The plants within a row are 30” apart and the rows are about 3’ apart.  Also note that all of the soil in the bed has been covered with mulch to prevent soil splash during heavy rains.  Soil splash can introduce fungal spores onto the plant leaves which should be avoided.  There is a soaker hose connecting all of these plants for watering, but you can’t see it as it’s almost completely covered by the mulch.

Photo 5: Tomato plants staked in bed with soaker hose under layer of mulch.

Photo 5: Tomato plants staked in bed with soaker hose under layer of mulch.

If you follow these suggestions with your tomato plants you’ll be rewarded with healthy plants and loads of ripe fruit by the end of July!  Please contact me at marklevisay@gmail.com with any questions you may have.

Spotlight on Annuals: Angelonia “Archangel Pink”

by Mark Levisay

Len Lamm of the Corner Store Garden Center introduced me to a flowering annual that is new to me but looks like a worthwhile addition to your garden.  “Archangel pink” angelonia (angelonia angustifolia) is a hybrid “summer snapdragon” developed by the Ball Seed Company.  Even though it is often called the “summer snapdragon” it is actually not a true snapdragon and is in the same family of plants as penstemon and foxglove.

Easy-to-grow Angelonia works in containers or borders.

Easy-to-grow Angelonia works in containers or borders.

Low maintenance and deer resistant

Angelonia “Archangel pink” has a lot going for it.  The upright plants are deer resistant and both heat and drought tolerant.  They bloom from late spring through the summer, and don’t require deadheading.  The long lasting flowers have a lovely scent and attract butterflies and hummingbirds.  The modest sized plants spread 10-12” horizontally and are typically from 12-14” tall.  They’re considered low maintenance as they won’t require a lot of pruning or deadheading through their blooming season.  The Angelonia flowers are also good for cut arrangements and remind me a little of orchid flowers.

Angelonia is a stunning addition to any garden.

Angelonia is a stunning addition to any garden.

A beautiful, unique plant for containers or borders

This Angelonia would seem like a welcome addition to a lot of containers, as it won’t overwhelm its neighbors with the upright habit and modest size.  Combining this with some more low growing/spreading plants would be a winning combination.  You can also plant this in a border for the long lasting pink color or in groups where you’d appreciate their scent.  Ball Seed advises watering two or three times per week for the first three weeks after you plant the Angelonia, but just weekly after that.  Fertilizing once a month with a fertilizer like Espoma’s “Flower-Tone” should keep your plants blooming all summer long!

Give this beautiful annual a try and let me know how you like it.  Any questions contact me at marklevisay@gmail.com.

Watering tips

by Mark Levisay

It is one of gardening’s great contradictions that the symptoms of under and over-watering look similar (drooping plants, browning leaves), so it’s important to pay attention to the water needs of the plants in your garden. 

How much water

A rain gauge is a good place to start, as we’re blessed by year round rains in central VA, and many weeks nature will give our plants plenty of moisture.  In general 1” of rain per week will satisfy most mature plants, but there are certain times when a single rain storm may not be adequate.  This is especially true of starting seeds or transplanting seedlings, as they need frequent, shallow watering to get them going.  Plants also need steady moisture levels when they’re setting fruit or seeds (melons, beans) or during head development (broccoli, cabbage).  Asparagus needs good moisture early on as they are developing spears at this time of year and we’re harvesting them and expecting more to grow! 

Containers are probably going to need more than 1” of water per week, especially in the hottest summer weather when they may need water every day.  Lawns generally only need water when you’ve planted seed.  Most of our lawn grasses are “cool season” meaning they perform best in spring and fall.  They’re experts at becoming dormant in the heat of the summer, which may not be attractive but does them no harm.  The grass will green up when the sun is lower and more rain occurs.

A watering wand allows you to deliver water to the base of the plant.

A watering wand allows you to deliver water to the base of the plant.

How to water

There are several methods of delivering water to plants.  If you have a few containers, use a watering can to deliver water to each plant directly.  If you’re using a hose, I recommend using a watering “wand” several feet long with a shower type head to be able to easily reach the base of the plant.  In general you want to avoid getting water on the plant leaves, especially if you are watering in the evening.  Wet foliage can encourage fungal diseases to grow and spread-this can be a major problem in your tomato patch.  Oscillating and impact sprinklers are good at covering large areas, but need to be used early in the day, as they’re going to get a lot of water on the foliage.  If you use this method during the heat of the day you’ll also be fighting evaporation, and waste a lot of water.  I’d use these sprinklers when I was planting new grass seed in my lawn.

Soaker hoses

I personally use soaker hoses extensively in my vegetable garden.  They are not really useful for seed germination, but once plants get roots established they provide deep water without wetting the leaves, and minimize evaporation.  I set up “circuits” so that a single run of hose will water all of my tomatoes and another will do the pepper plants.  This way you can easily deal with different plants’ varying water needs throughout the growing season. 

Soaker hose laid down in the beds before planting tomatoes.

Soaker hose laid down in the beds before planting tomatoes.

Most soaker hoses come with a pressure reducing washer at the hose connection end.  This is important, as the normal water pressure coming from the house will cause weak spots in the hose to spurt out too much water and leave other spots dry.  The small hole in the washer reduces the pressure and allows for a slow gentle soaking from the hose.  I also use a simple wind-up timer on the spigot at the house to control the length of the watering session.  You want to get a good deep watering but not flood the bed.  It’s really easy to forget you’ve got the soaker hoses going, so I usually set the timer for about ½ hour per circuit.  It can be easy to over water with the soaker hoses, so poke down into the soil if it looks dry at the surface to see if you still have moisture down deeper.

Pay attention to weekly rainfall, water properly and only when needed.  Your plants should be happy all through the summer!

Have a garden question? Send me an email at marklevisay@gmail.com.

It’s May, so what can I plant?

by Mark Levisay

This is the time of year that we’re all thinking about what to plant in the garden.  Cold hardy plants like broccoli and spinach should already be in, but what about tomatoes, or maybe zinnias?  The last couple of weeks of April have been relatively cold, and we even had some frost on April, 19 in our yard. April can be a risky time to put out our most sensitive plants. The long range weather forecast has us dealing with cool weather for another week or so and we’ll have to watch the forecasts to see what May is going to look like. Right now it appears that the cool weather will hang on through May 14th!

What you should be getting ready to plant in May

Most garden centers are getting in their annual flower seedlings and have plenty of perennial flowers and shrubs available.  Most of the shrubs and perennial flowers can probably go out right away, and if you’re planting annual flowers from seed you can go ahead and put them in the soil as it will be a week or more before they germinate.  Annual flower transplants might wait a week or so to actually go into the soil.  Buy them if you have a chance but keep them in their flats so you can put them in the garage on a cold night.  Our region’s last frost can be as late as May 10th, so it’s better to err on the side of caution.

Herbs

Many herbs can go into the garden right away, as thyme, rosemary and sage are perennials—at least in our garden.  We’ve already planted dill and parsley seed and the dill is coming up.  Last season’s parsley did well over the winter and is ready to harvest now.  Being a biennial it will go to seed when the summer weather gets hot.  Basil is a big exception, as it is very cold sensitive and should probably  be sheltered until mid-May.

Vegetables

As far as vegetables go, we’re just about ready to put most of them in.  Most of these are going to planted as seeds so the soil temperature is going to affect their ability to germinate.  Beans, cucumbers, squash and corn will all do best in warm soil, though certain varieties have been bred to do better in cooler soils.  I am personally looking at planting these during the second week of May.  If I was planting watermelons or cantaloupes I’d even wait a couple more weeks until the soil is really warm.

Since our growing season is so long I’d plan to do multiple plantings of all of my vegetables (every 3 or 4 weeks) so save some space. You can also do plantings of the warm season vegetables in areas vacated when you harvest spring vegetables.  I usually put squash in where the broccoli and cabbage were planted, and often follow peas and lettuce with beans.  If you are planting corn, consider planting it in “blocks” of 3 or 4 short rows, which aids in germination and helps fill the ears with kernels.  Planting several blocks 2 or 3 weeks apart will keep your harvest going for a long time.

Tomatoes “hardening off” outside in pots before being planted in the garden.

Tomatoes “hardening off” outside in pots before being planted in the garden.

Tomatoes and peppers are generally going into the garden as established plants.  They’re pretty sensitive to cold, so I usually wait until mid-May to put them out.  I’ve started a lot of them indoors under fluorescent lights and they’re starting to get big.  This week (4/21) I’m going to transplant them from their “6 packs” to 3” or 4” individual pots and start hardening them off.  This means slowly introducing them to the outdoors during the day and increasing the amount of sunlight day by day.  They’ll come inside during cold nights.  Two to three weeks from now they’ll be ready to go out into the garden.  If you’re buying your plants they should be hardened off already, though you should still wait to put them out until danger of frost is past.  I try to put up my tomato supports and route my soaker hoses now so that the tomato patch is ready to receive the plants when they’re ready.

Some people buy squash, cucumber and melon seedlings to put out in the garden.  The cucurbit family of plants are difficult to transplant on top of being cold sensitive.  I’d look for plants started in peat pots that will require less handling when you put them in the soil.  Plan on putting them out when you do the tomatoes and peppers.

Watch the weather forecasts as we go into May and plant when it looks like it’s (finally) warming up.  Plan on succession plantings of your favorite vegetables and you should enjoy fresh produce all summer long!  More on tomatoes next time.

Have a garden question? Send me an email at marklevisay@gmail.com.

Spring Fertilizer Guide: Organic Plant-Tone® all-purpose fertilizer

by Mark Levisay

Espoma’s Plant-Tone is an organic all-purpose fertilizer with an N-P-K analysis of 5-3-3.  In addition, it contains 3% calcium (Ca), 1% magnesium (Mg) and 1% sulfur (S).  Unlike Holly-Tone, which I wrote about in a previous post, this product will not have a major influence on soil pH. 

Espoma’s Plant-Tone organic fertilizer.

Espoma’s Plant-Tone organic fertilizer.

Almost 2/3 of the nitrogen (N) in this fertilizer is water in-soluble, or slow release.  It comes from feather meal, poultry manure, bone meal and alfalfa meal which are all farm by-products.  It’s great to be able to use these by-products but there is an unfortunate side effect.  Our dogs think Plant-Tone tastes great, and we only use it in areas where the dogs can be fenced out.

Espoma’s “Bio-Tone” provides beneficial bacteria

In addition to the regular nutritional components, Plant-Tone and all of the other Espoma xxx-Tone products contain beneficial bacteria.  This “Bio-Tone” component helps build and maintain a healthy biome in the soil.  Plant roots depend on both bacteria and fungi to be able to access water and nutrients in the soil pore spaces.  This biological activity breaks down the poultry manure and bone meal into molecules the plant roots can then take up into the plant.  Since bacteria are alive, there will be a “best by” date on the bag.  Over time the bacteria will become less active even though the other fertilizer components will still be effective.

Espoma Plant-Tone’s ingredients panel.

Espoma Plant-Tone’s ingredients panel.

General purpose fertilizer

As an all-purpose fertilizer, Plant-Tone can be used anywhere in the garden on trees, flowers or vegetables.  I use it almost exclusively in my vegetable garden, both at planting time in the soil or as a side dressing for growing plants on a monthly basis.  We avoid it in our flower garden only because the dogs try to dig it up and eat it! 

Espoma recommends using it on established plants like trees or shrubs in the spring, and then again in a lower amount in the fall.  For specific application amounts and instructions, check the back of the bag, or go to espoma.com.  For more information on the specific feeding requirements of individual plants go to the Virginia Cooperative Extension website at ext.vt.edu.

If you have any questions feel free to e-mail me at marklevisay@gmail.com

Happy gardening!

Tomatoes in Central Virginia, Part 2: Planting tips

by Mark Levisay

Now that you have a better idea of what varieties of tomatoes you want to plant, let’s talk about how to plant them to maximize their growth throughout the summer. 

Spacing to minimize disease

Proper spacing of the individual plants is important in minimizing the spread of disease later in the summer. Rows should be at least 3’ apart, with the plants in the rows 2-3’ apart. The idea is to get as much sunlight to the plants and promote air movement to minimize fungal diseases. I use soaker hoses throughout my tomato beds, and it helps to have them laid out in addition to your support stakes or poles before you do any planting.


Tomatoes planted and tied to support poles.

Tomatoes planted and tied to support poles.

Establish strong roots

If you look closely at your tomato plants you’ll notice lots of little “hairs” on the main stem.  These will become roots if they come in contact with the soil, so your goal is to plant your seedlings as deeply as possible for maximum root development.  You’ll also notice two small oval leaves, which you want to pinch off. 

Bury your seedlings to within about 2” of the first set of leaves. Plant them as close as you can to your support stakes or poles and the soaker hose if you’re using it.  Never bury any leaves under the soil as they will rot and cause trouble later.  Mulch thoroughly all around the plants to conserve moisture and prevent soil splash onto the leaves.  (Important note: The soil splash is one of the ways that fungal spores in the soil can come into contact with the tomato plant.) 

Keeping good constant moisture in the soil, without being soggy, is a good way to prevent blossom end rot on the fruit. I use hardwood bark mulch in my tomato bed, but straw works well and you can use newspaper between the plants as well. Water thoroughly after mulching.

Feed plants through the summer

Tomatoes are classified as heavy feeders so it’s important to give them fertilizer of some sort all during the summer. Before I plant, I mix a cup or so of Espoma’s Plant Tone organic fertilizer in the soil where each seedling will go. Mix this in the soil when you dig your hole, and then firm the soil around the plant. You can use a high nitrogen (N) fertilizer at the beginning as you’re trying to promote rapid growth of the new plants.

Once the plants have begun to set lots of green fruit it will be time to add more fertilizer. Use a high nitrogen fertilizer for this application. Two weeks after your first ripe tomatoes, fertilize again, but this time use a fertilizer with a higher phosphorous (P) content, as this helps promote the fruit production. Continue this monthly schedule until fall.

Support plants

I start tying up my tomatoes as soon as they’re tall enough to get the ties around—sometimes even when I plant them.  Tomatoes want to grow UP and I think they do better if you help them climb the poles. Tying up also helps prevent damage from storms and high winds. In addition, we want the plant leaves as far from the soil as possible for disease prevention and the ties will help with upward growth.

To make the ties, I use old sheets or pillowcases torn into ½-3/4” strips about 10-12” long and tie them up after every 6-9” of growth.  I’ve also learned to put a wood or drywall screw into my poles ½ to 2/3 of the way up from the ground on the opposite side from the plants.  Later in the summer when your plants are loaded with fruit they’ll want to sag down and the screws give the ties something to latch on to.

Next time we’ll talk about training, pruning and other cultural practices in the tomato bed.

Have a garden question? Send me an email at marklevisay@gmail.com.

Tomatoes in Central Virginia, Part 1: Choosing the right variety

by Mark Levisay

Without a doubt tomatoes are the most commonly grown garden plants.  Nothing beats the flavor of a home grown tomato picked fresh from the garden—especially after eating the ones offered at the grocery store.  Seed catalogs give you lots of options for starting your own plants and garden centers usually have dozens of varieties ready to go right into your garden. With all of these choices available, how can you choose the right ones for you?

How much room do you have?

Tomatoes come in all sizes. They are usually classed in three groups 1. midget, patio or dwarf, 2. determinate and 3. indeterminate.  These descriptions refer to their growth habit and may affect your varietal choice depending on how much room you have for tomatoes in your garden. The smallest tomatoes are designed for pots or containers and probably won’t need much if any support.  Determinate plants will only grow to a set height (usually 3-4’) and then stop.  They usually need some type of caging or staking, but not as much as the indeterminate types.  Indeterminate tomatoes are the ones that get big—continuing to grow through the season until killed by frost or disease. They’ll need tall stakes or heavy duty cages for support.

Big Beef tomatoes tied up to supports.

Big Beef tomatoes tied up to supports.

How are you going to use them?

Choosing the varieties of tomato for your garden is hard because there are so many choices available!  It seems like tomatoes come in every size and color, so deciding what you want to use the fruit for will help with your decision.  Cherry and “grape” tomatoes are great in salads.  Most slicers and beefsteaks are great for general eating or putting on your BLT at lunch!  Paste tomatoes are often used for canning or sauce production, though I make salsa and spaghetti sauce out of slicers. 

Heirloom varieties

If you’ve never grown tomatoes in your garden before, consider trying an “heirloom” variety.  These are usually older varieties passed down through the generations and prized for their flavor. Many are not disease resistant, so if you’ve grown tomatoes before you may have trouble with them as the disease fungal spores can survive in garden soil for up to five years. 

Disease resistance is critical

In my garden, where I’ve grown tomatoes for 30 years, I look for the most disease resistant varieties I can find.  Many seed catalogs will list the disease resistance (using the abbreviations from the list of diseases below) in the description of each variety.  Generally the more letters listed in the description the better!  For example, in my Park Seed catalog the Better Boy Hybrid is listed as V/F1/N/A/St, giving you an idea of its general disease resistance.

Unfortunately, there are a lot of diseases that affect tomatoes. Eight of them are fungal in nature and will persist in your soil from year to year.  Early Blight (As), Late Blight (LB), Anthracnose (An), Fusarium Wilt (races 1,2,3 F1 F2 F3), Verticillium Wilt (V), Alternaria stem canker/crown wilt (A), Stemphylium gray leaf spot (St) and Septoria leaf spot (L).  You also have Tobacco Mosaic virus (T), Spotted Wilt virus (Swv), Bacterial Wilt (B) and Bacterial Speck (Pst). 

In addition to choosing the right variety, there are some tricks in how you grow the plants in your garden that help a lot, and we’ll explore that at length next time.

And remember, regardless of size, all tomatoes are tender annuals that require full sun and won’t tolerate frost at all. 

Lemon Boy tomatoes ripening in late summer.

Lemon Boy tomatoes ripening in late summer.

My tomato choices

This year in my garden I’m going to grow four different tomatoes.  I’m growing Sweet Million Hybrids, a red cherry variety that is indeterminate  with F/N/L/T resistance.  This variety is very vigorous and usually grows taller than the poles I use (8’ 2x2” posts).  Next is a red grape tomato we’ve come to love, called Juliet Hybrid which is a resistant, indeterminate type that will climb the pole and then climb back to the ground and look for the next pole down the row to climb back up on!  I grow Lemon Boy Hybrid yellow tomatoes which seem to have good disease resistance, maybe a little less acid than the red tomatoes and are indeterminate. They make really good yellow salsa!  My main red slicer is the Big Beef Hybrid, a former AAS winner.  These indeterminate plants have excellent disease resistance and produce loads of baseball to softball size fruits.

Next time I’ll review growing methods to get the most out of your tomato patch.

Have a garden question? Send me an email at marklevisay@gmail.com.

Spring Fertilizer Guide: Organic Holly Tone for acid-loving plants

by Mark Levisay

I’m going to take a break from talking about plants and shift focus to fertilizers and soil additives.  The Corner Store Garden Center carries an extensive line of Espoma products that you don’t know about since you can’t come inside the greenhouse and see them all lined up!  That’s a shame, because many of these products could prove useful to you during the garden season.  I took my camera (and mask) up to the greenhouse one afternoon and photographed each product’s bag, front and back, so you could see what you’re missing.  I’ll try to explain what’s in each product and what it can do for your garden.

Fertilizer for acid-loving plants

Holly Tone is an organic, balanced fertilizer with an N-P-K analysis of 4-3-4. It also contains 3% calcium (Ca), 1% magnesium (Mg) and 5% sulfur (S).  The sulfur component is the key here, as this product will act to raise the acidity of the soil where it’s used. 

Espoma’s organic Holly-Tone fertilizer for acid-loving plants.

Espoma’s organic Holly-Tone fertilizer for acid-loving plants.

Espoma’s “Bio-Tone” provides beneficial bacteria

You’ll also notice as you look at the side panel of the bag that it contains 3 types of bacteria.  Healthy soil contains a mix of both bacteria and fungus, and these organisms are critical in breaking down chemical compounds into forms the plant can absorb.  Adding these beneficial bacteria to your soil will improve the overall “biome” and help plants thrive.  All of Espoma’s xxx-Tone fertilizers will have this “Bio-Tone” component.   A side effect of this is that each package will have a “use by” date, as these bacteria colonies will slowly decline over time.

Another thing you’ll notice on the package is the source of the water-insoluble nitrogen (N).  This in-soluble nitrogen needs to be broken down by organisms in the soil to be available to the plant, so it’s considered slow release.  Feather meal, bone meal and poultry manure are all by-products of chicken  and egg production, and alfalfa meal is derived from a common farm crop.  It’s great that these by-products can be used as fertilizer and they also help improve the tilth of heavy soils.  An unfortunate side-effect is that our dogs think this stuff is candy and we can only use it in areas where the dogs are fenced out!

Ingredients panel for Espoma’s Holly-Tone organic fertilizer.

Ingredients panel for Espoma’s Holly-Tone organic fertilizer.

Plants and application

There are a number of plants that benefit from growing in acidic soil conditions.  Evergreen trees and shrubs, azaleas, rhododendrons and mountain laurels, and blueberries and other bramble berries come to mind.  For a more complete list go to espoma.com for additional information.  They have good lists of plants that benefit and application instructions. 

Espoma recommends a spring application and a smaller fall application for shrubs and two separate spring applications for berries.  To be sure for individual plant varieties I’d refer to Virginia Cooperative Extension’s website (ext.vt.edu) as they have loads of information on the nutritional requirements for most garden plants.

Next time we’ll talk about Plant Tone, which is an organic fertilizer I have used a lot in my vegetable garden with great results.

Have a garden question? Send me an email at marklevisay@gmail.com.

Tomatoes in Central Virginia, Part 3: Growing tips

by Mark Levisay

Now that you’ve got your tomato plants in the ground, how do you care for them to ensure maximum fruit production?  I have found there are several things you can do throughout the growing season to help your plants thrive.

Tomato plants tied to support poles as they grow.

Tomato plants tied to support poles as they grow.

Provide great support

The first thing is to give the plants good support to keep them off the ground and growing vertically.  I use 8’ 2x2” poles to support my plants, though cages can work as well.  Using strips of old sheets or pillowcases I tie the growing leaders to the poles at least every week.  An interval of 4-8” is probably good-more supports will help hold up heavy sets of fruit.  I usually tie just under a node, which is where a leaf comes off the plant’s stem.  Don’t tie them too tight, as the stems will get bigger over the summer and you don’t want to prevent the flow of nutrients up the stems to the leaves and fruit.

Continue tying all summer long, at least until the plant gets to the top of the poles!  The goal here is to keep the plants away from soil splash during heavy rains, as that can infect the plant with fungal spores present in the soil.  The ties and supports also prevent damage from summer storms.

Prune regularly

Secondly we want to prune the plant and train it to grow with two or three main “leaders,” which get tied up to the support.  Tomatoes want to produce many growing shoots and will produce “suckers” at almost every node.  These shoots will produce flowers and fruit if allowed to grow, but the root system will have trouble supporting all of these stems and the plant will be very thick with foliage. 

We also want to encourage air movement within the tomato patch and help more sunlight reach the fruit so it can ripen.  When the plant is 12-18” tall you will notice one or two of the suckers will be really big and robust.  I let one or two grow in addition to the main leader and remove all other suckers that emerge.

A good rule of thumb is to pinch off any suckers on the plant each time you tie the new growth up or roughly once a week.  You’ll even notice suckers that appear where you’ve already pinched one off but remove it again if it appears.  This pruning actually stimulates the plant’s vertical growth which will aid with air movement and sun exposure.

Fertilize strategically

Fertilizing your plants is really important as tomatoes are classed as heavy feeders.  I use Plant Tone organic fertilizer when I plant the seedlings.  Once the first fruit has set, about 2 weeks before your first ripe fruit is expected, fertilize each plant with a fertilizer relatively high in nitrogen (N).  After that, at one month intervals, feed the plant a fertilizer that is higher in Phosphorus (P) as that will help support the flowering and fruit production.  Remember, if you are growing indeterminate plants they will continue to grow, flower and produce fruit until killed by frost or disease.

Keep it clean

To prevent the spread of disease it’s also important to practice good hygiene in your tomato patch.  I generally consider any yellow or brown leaves I see to be diseased and remove them as soon as I can.  Not only remove them from the plant, but from the garden as well.  I don’t even put them in my compost pile, as the fungal spores can survive for up to 5 years in compost or soil, unless your compost pile is really achieving the high temperature needed to kill them (131F for 3 days). 

When in doubt, throw them out!  Your plants will start to look bare at the bottom, but that won’t affect the fruit production if they’re actively growing at the top.  At the end of the season, when your tomato plants are dead, remove all of the old leaves and stems from the garden, and try to plan for having your tomatoes in a different area next year.  Most farmers practice crop rotation, and you should too.

Good luck!

Have a garden question? Send me an email at marklevisay@gmail.com.

Growing vegetables in containers

by Mark Levisay

What do you do if you want to grow vegetables (or flowers for that matter) and you don’t have a yard to garden in?  If you have any sunny spot outside your home, you can grow a lot of different kinds of vegetables in containers.  Just as with garden beds, having lots of sun is key, as most vegetables simply won’t thrive in the shade.

Drainage is key

Almost any kind of container will work as long as it has drainage holes at the bottom.  The water must be able to readily drain out of the pot, and not sit in the bottom.  Plant roots want to be moist but not swimming in water, as they also need air to live.  Pot size will vary depending on the space you have and the types of plants you want to grow.  Obviously a tomato or pepper plant will need a larger pot than a couple of heads of lettuce or a few herbs. 

Larger pots are usually better, as you may need to water them less often.  One drawback of the larger pots is their depth which seems to increase faster than the diameter.  Most plant roots will only live in the top 8-10” of soil so the bottom of the pot is not really needed.  Many people use some kind of filler that doesn’t hold water and allows drainage, so your potting soil only fills the top half of the pot.  Collapsed plastic plant pots, closed cell Styrofoam, or just bark mulch will all work.  Rocks would work fine but the pot will be really heavy if you have to move it!

Railings can provide added support for tomatoes growing in containers.

Railings can provide added support for tomatoes growing in containers.

What should I plant? 

Determinate tomatoes (they only get to a certain size) or peppers are good candidates if you have large pots.  Herbs work really well, and several varieties could be grown together in a large pot.  Basil tends to get pretty big by late summer, so you’ll probably need a pretty big pot for that.  Lettuce and spinach can work in smaller pots if you keep the number of plants low.  Cucumbers should work well if you have some kind of trellis for the vines to climb on.

Planting and caring for your container crops

Planting is pretty much the same as it would be in a garden bed.  After checking your drainage holes (you may need to drill these out in plastic pots or add more to what’s already there) fill the bottom half (of large pots) with some kind of filler.  Add your potting soil, plant the seedlings or seeds, and water thoroughly.  Mulch is often helpful for retaining moisture.  Commercial potting soil usually contains a slow release fertilizer, so you’re good to go for 4-6 weeks before you need to add more.  A water soluble fertilizer like Miracle Gro or slow release pellets like Osmocote will work well.  Water frequently and thoroughly-you should see some water run out of the bottom of the pot. 

Unless your pots are sitting on gravel, they should be up off the surface of your patio or deck by at least an inch.  There are all kinds of plant stands of varying height which will do the trick.  We even found a plastic product called Pot “Toes” on Amazon-use 3 or 4 per pot to raise the pot.  This promotes drainage and allows the surface (wood, concrete or tile) to dry out between waterings.  In our warmest summer weather you may need to water almost every day, as the entire pot will be over 90 degrees and evaporation will be rapid.

With plenty of sun, basil grows well in containers.

With plenty of sun, basil grows well in containers.

At the end of the growing season you have two choice of what to do with your pot.  You can pull out your spent plants and save the pots full of soil for next year. This works well if you’ve planted perennial flowers, as many will over-winter.  You’ll just need to add fertilizer at the beginning of the next growing season, as the original fertilizer will be depleted.  The other procedure is to remove the soil and filler from the pot completely.  The used potting soil will make a good addition to traditional garden beds if you have them.  Rinse your pots with water to remove soil and plant debris, and then disinfect the pots with a water and bleach solution mixed 10 parts water to 1 part bleach.  This should kill any fungal spores or harmful bacterial that may have accumulated during the growing season.  Store the pots somewhere dry and they’re ready to start all over next spring.  You’ll get many years of use out of good quality pots, so why not give it a try?

Have a garden question? Send me an email at marklevisay@gmail.com.